Let's face it: Palm OS isn't a great fit for the modern web. It lacks support for HTML5 technologies and the latest HTTPS protocols, meaning most websites aren't accessible without the use of a proxy service or external renderer.
But never fear! lite.palmdb.net is here! This stripped-down version of the website is designed from the ground up to be Palm browser-friendly, enabling you to download a complete catalog of apps directly to your device.
Long ago, limited internet connectivity was provided to older Palm models via external modems and wireless add-ons. While these methods no longer work, newer Palm devices can still go online via WiFi or Bluetooth.
Table of Contents
References
This guide was made possible with the help of the Palm community. Check out these resources for further information!
- Palm OS internet access from Linux via Bluetooth Dial-Up Networking (DUN) - by Abraham Moller via YouTube
- How to share your Internet connection via Bluetooth to a Palm OS device - by Mauricio Freitas via GeekZone
Connect to WiFi
Prerequisites
- A WiFi router with 802.11b support
- A PC or smartphone connected to the same local network as the WiFi router
Setup
It may surprise you, but some Palm OS devices are equipped with WiFi and can still get online through many routers. Unfortunately, most ISP-supplied router/modem combo boxes won't offer legacy device support, but many third-party options do--though it may be disabled by default.
A word of caution before proceeding: one reason old WiFi standards were abandoned is a lack of security. WEP, WPA, and MAC address filtering are all easily bypassed with common software tools. While they might be enough to discourage neighbors, any determined intruder can certainly use a Palm-enabled access point to break into your home network. If WiFi security is a concern, it is recommended to connect via Bluetooth DUN instead.
Step 1a: Configure your WiFi router
On any modern device connected to the WiFi network, open a web browser and enter the router IP address you want to configure. Typically, this will be either 192.168.1.1 or 10.0.0.1. Some routers also offer domains to simplify access, such as router.asus.com for most Asus-branded models.
Once connected, you will be prompted to login. If you've never configured your router before, you will need to look up the default credentials for your model. Most of the time, this is some combination like admin; admin, or administrator; default. (It is recommended to customize these credentials after logging in for better security.)
After logging in, navigate to wireless settings for the 2.4GHz band. (Palm devices cannot connect to 5GHz.) If settings are linked between bands, you may need to unlink them first. Each router's settings and menus will differ depending on model, but if 802.11b is supported, you should find an option to enable it here, either by name or simply as "Legacy".
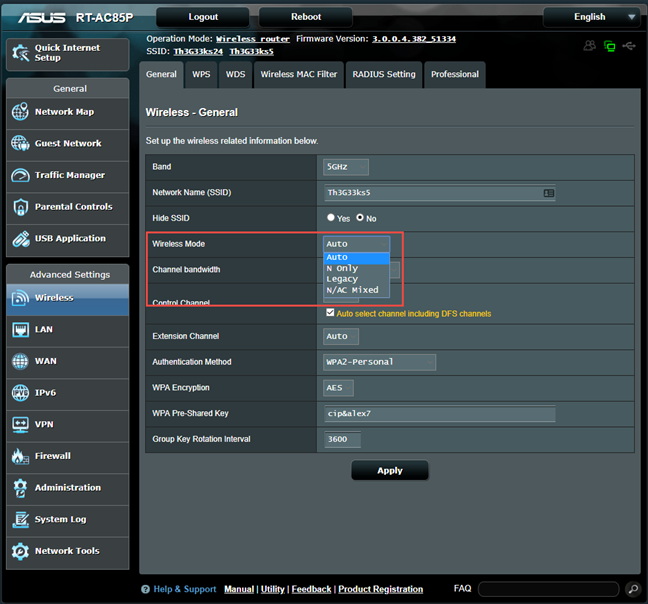
Next, set the authentication method depending on what your Palm OS device supports. Most WiFi-enabled Palms will require either WEP or WPA. Palm TX users can install an update to add WPA-2 support, which is preferable for best security. (Note that although the update is for WPA-2 Enterprise, modern routers can accept Palm TX connections over WPA-2 Personal as well.)
Step 1b: Enable MAC address filtering
In some cases, your Palm may refuse to connect even with outdated authentication methods enabled. In this case, the only option is to leave your WiFi network unprotected. This has the obvious downside of allowing anyone nearby to connect to your router undeterred.
In this case, an alternative is to filter out all devices except any Palms or other devices you may wish to grant access to the router.
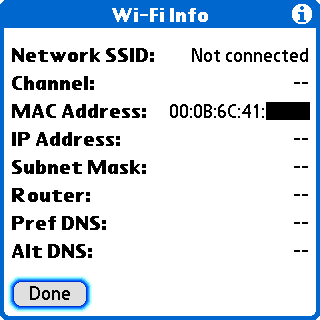
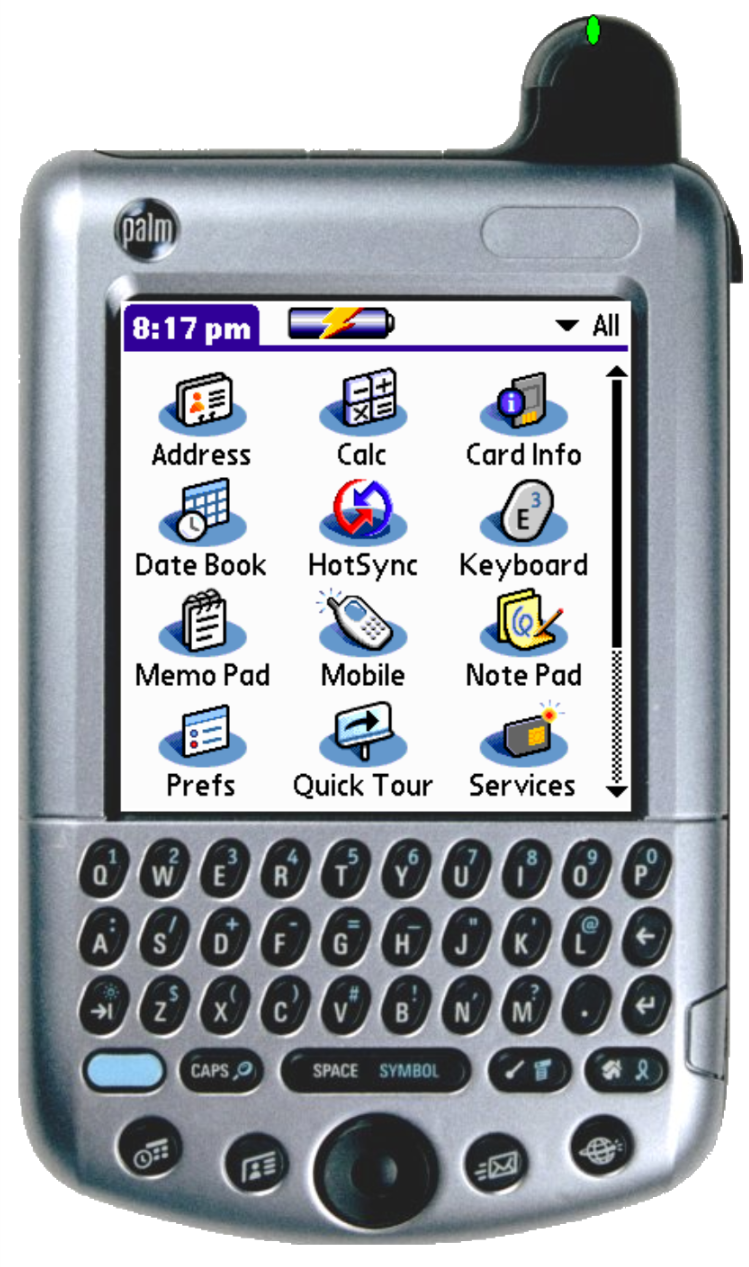
First, on your Palm device, navigate to "Prefs" > "Wi-Fi" > "Info". Here you will see your device's unique MAC address.
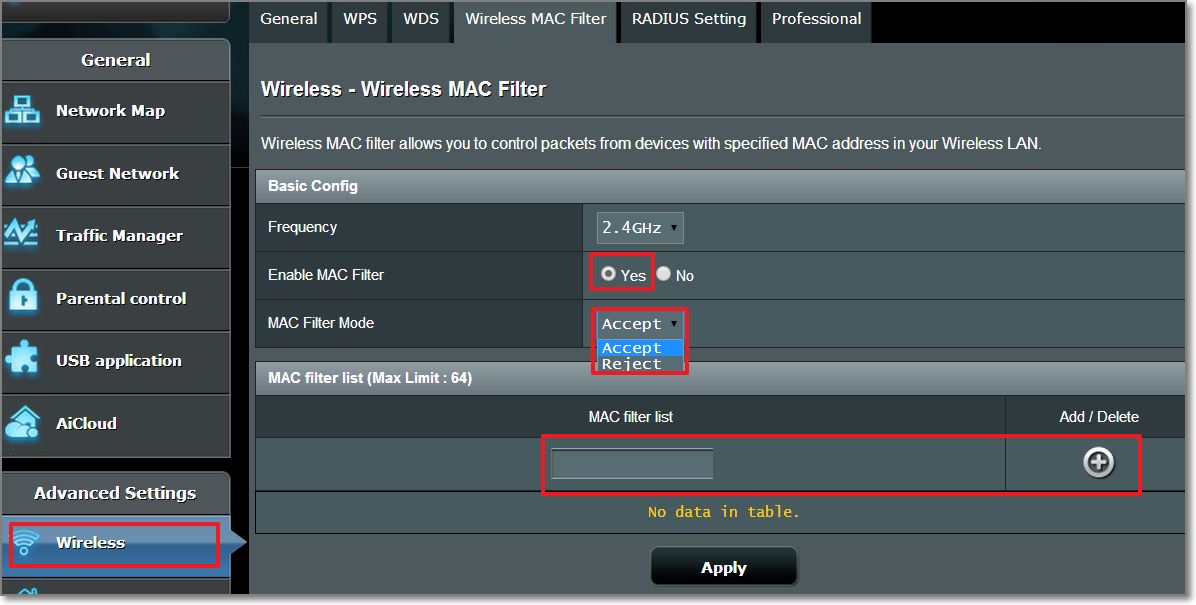
Next, return to your router configuration. Disable any form of password authentication, then enable MAC address filtering instead. A filter can serve one of two purposes: blacklist certain devices to exclude them from the network (and include all others) or whitelist certain devices to include them on the network (and exclude all others). In this case, we want to accept filtered devices only. (Again, the exact wording and options may differ depending on your router.)
Once the filter is enabled, you can create a new entry and add your Palm's MAC address to the whitelist.
Step 2: Connect your Palm to WiFi
Before continuing, make sure to save any changes to your router and wait for them to apply. It may take a few seconds, and your WiFi may briefly go offline in the meantime. When the connection returns, you'll know it's ready.
Return to your Palm and navigate to "Prefs" > "Wi-Fi" > "Setup". (Some devices may also have a WiFi shortcut in the navigation area at the bottom of the screen.) A scan will be performed automatically, after which you should see your router in the list of nearby hotspots.
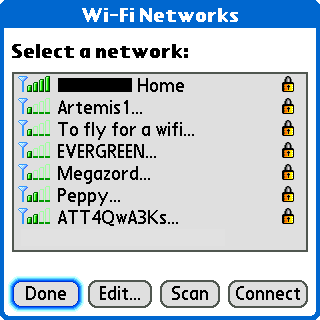
From here, connecting to WiFi is much the same as on any modern device. Select a network, enter the password (if any), and connect!
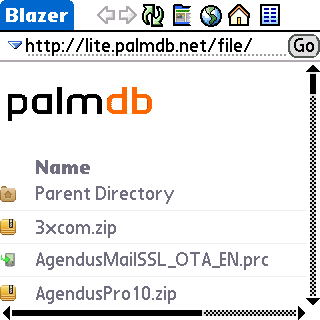
Now, you may find that much of the modern-day internet refuses to load on the built-in Blazer web browser. HTML5 and HTTPS are now the standard, and Blazer supports neither. However, you may get better results using a third-party browser like NetFront or Opera Mini. Why not try heading over to lite.palmdb.net and downloading some apps, for starters?
Enjoy the world wide web!
Connect to Bluetooth DUN
Prerequisites
- A Bluetooth-enabled Palm device
- An Android smartphone or tablet with Bluetooth and WiFi/mobile data (practically any model will do)
- A Bluetooth DUN server app, such as:
- BlueDUN+ (paid, free trial available)
- SecureTether (free)
Setup
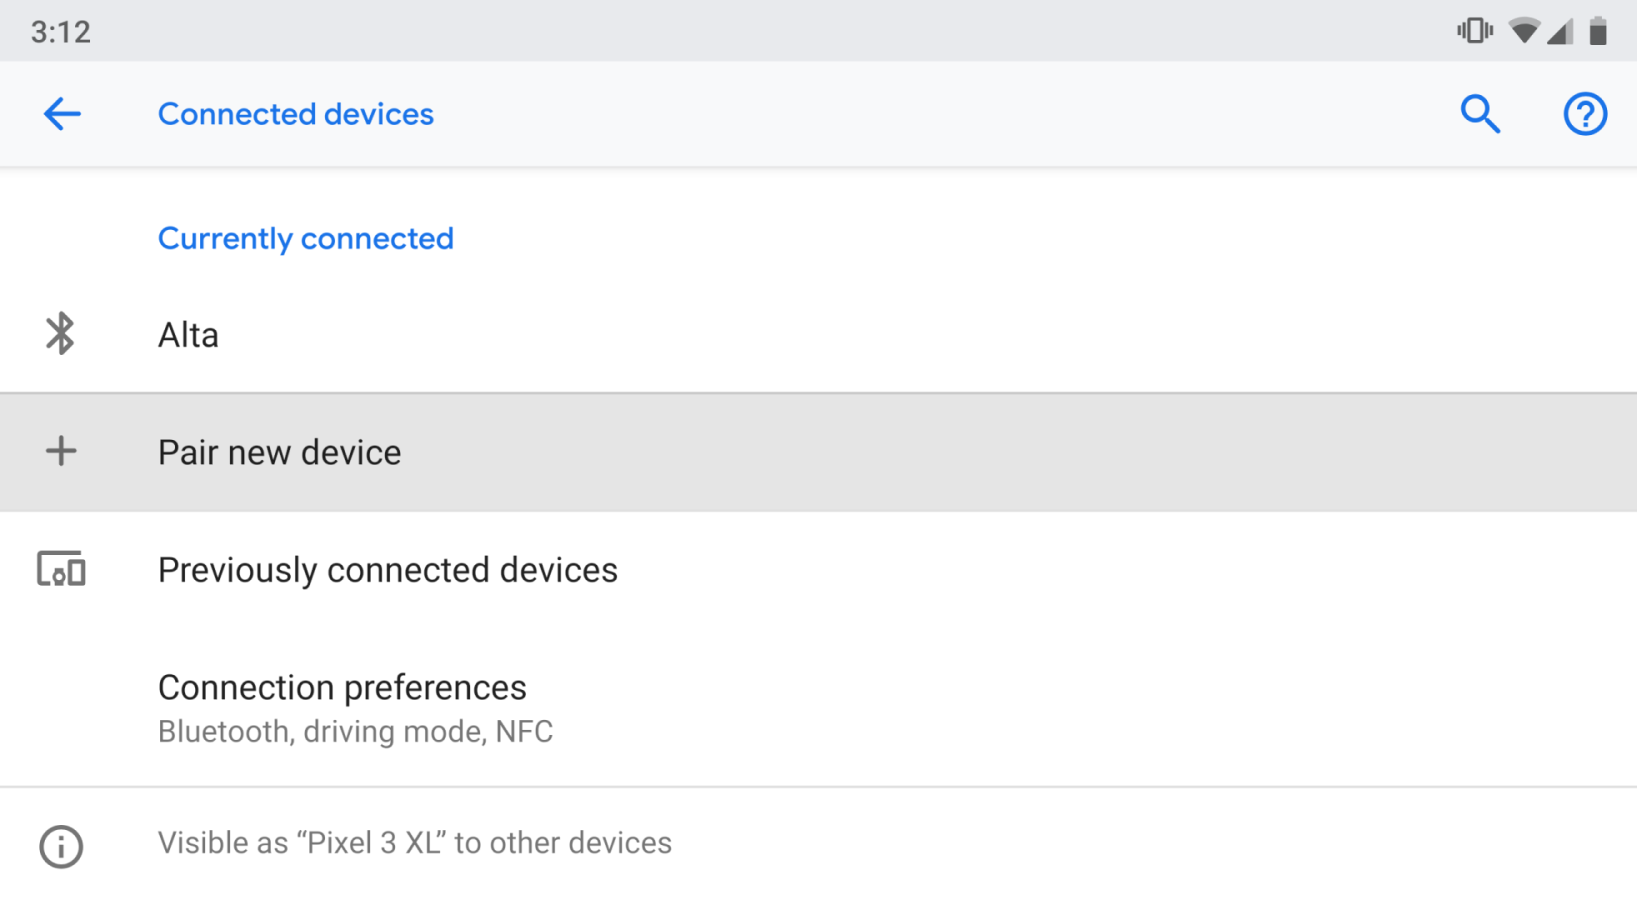
Step 1: Pair your Palm and Android devices over Bluetooth
To get started, navigate to your Android device's Bluetooth settings and choose "Pair new device". This will make your phone/tablet visible to other Bluetooth devices.
Next, switch to your Palm device and establish a connection. This process differs slightly depending on what kind of Palm device you have:
- Option 1: Go to Preferences > Network and create a new service. In the "Connection" dropdown box, choose "Edit Connections..." > "New...", then select "Connect to:" > "Local Network", "Via:" > "Bluetooth".
- (Treo Note: even though you aren't using it, you must enable phone service to proceed.)
- Option 2: Go to Preferences > Bluetooth. Choose "Setup Devices", and on the following screen, choose "LAN Setup".

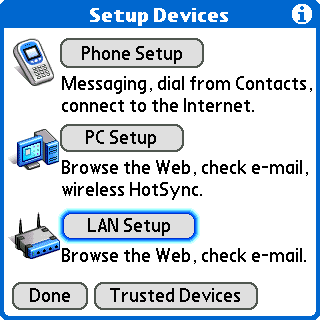
Continue through the initial setup screens until you reach the Bluetooth device selection screen. After a few seconds of searching, your Android device will appear in the list of nearby Bluetooth devices. Select it.
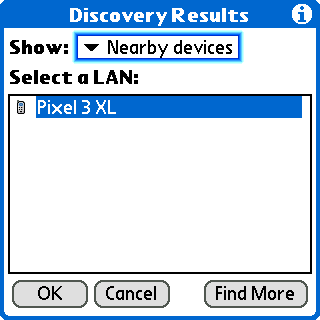
Step 2: Configure virtual LAN connection
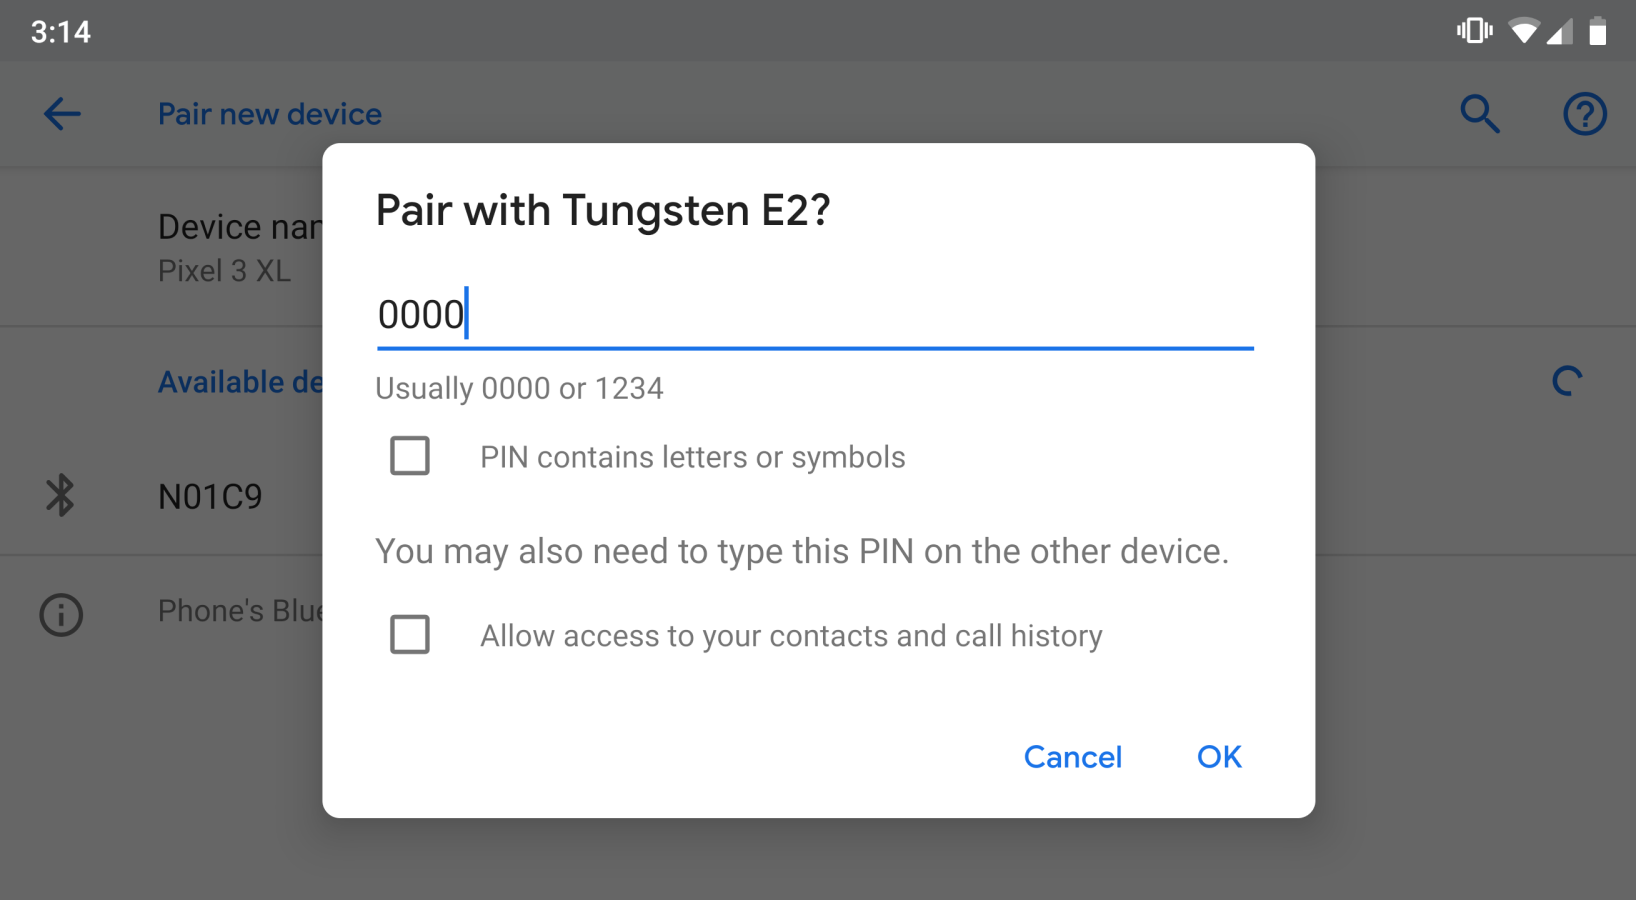
Once you have selected a "LAN" to connect to (i.e. your phone/tablet), you will be prompted to authenticate the connection. The Palm setup screen makes this sound far more complicated than it is. Rather than "get the LAN passkey from your network administrator", continue through the setup screens until you are prompted to enter a passkey yourself. Enter any four-digit combination into your Palm and tap "OK".
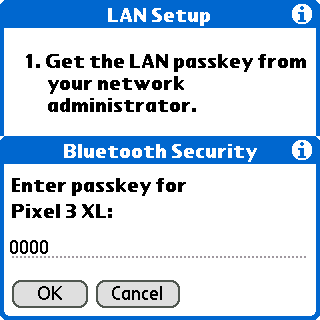
A pop-up will then appear on your Android device prompting you to enter the same passkey.
If you entered the passkey correctly, your Palm will accept the connection and continue the setup process.
Next, you'll be asked for a username and password to log in to the network. Like the Bluetooth passkey, what you enter here doesn't matter. Input any username you like and simply leave the password field blank.
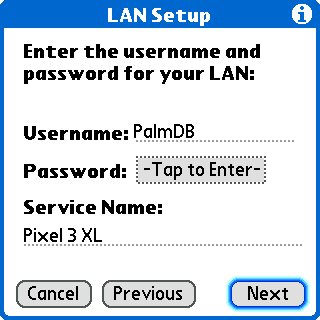
Click "Next" one last time and the LAN setup will complete. You will now see your Android phone/tablet listed as an available network service on your Palm's Bluetooth settings page.
Step 3: Activate Bluetooth DUN
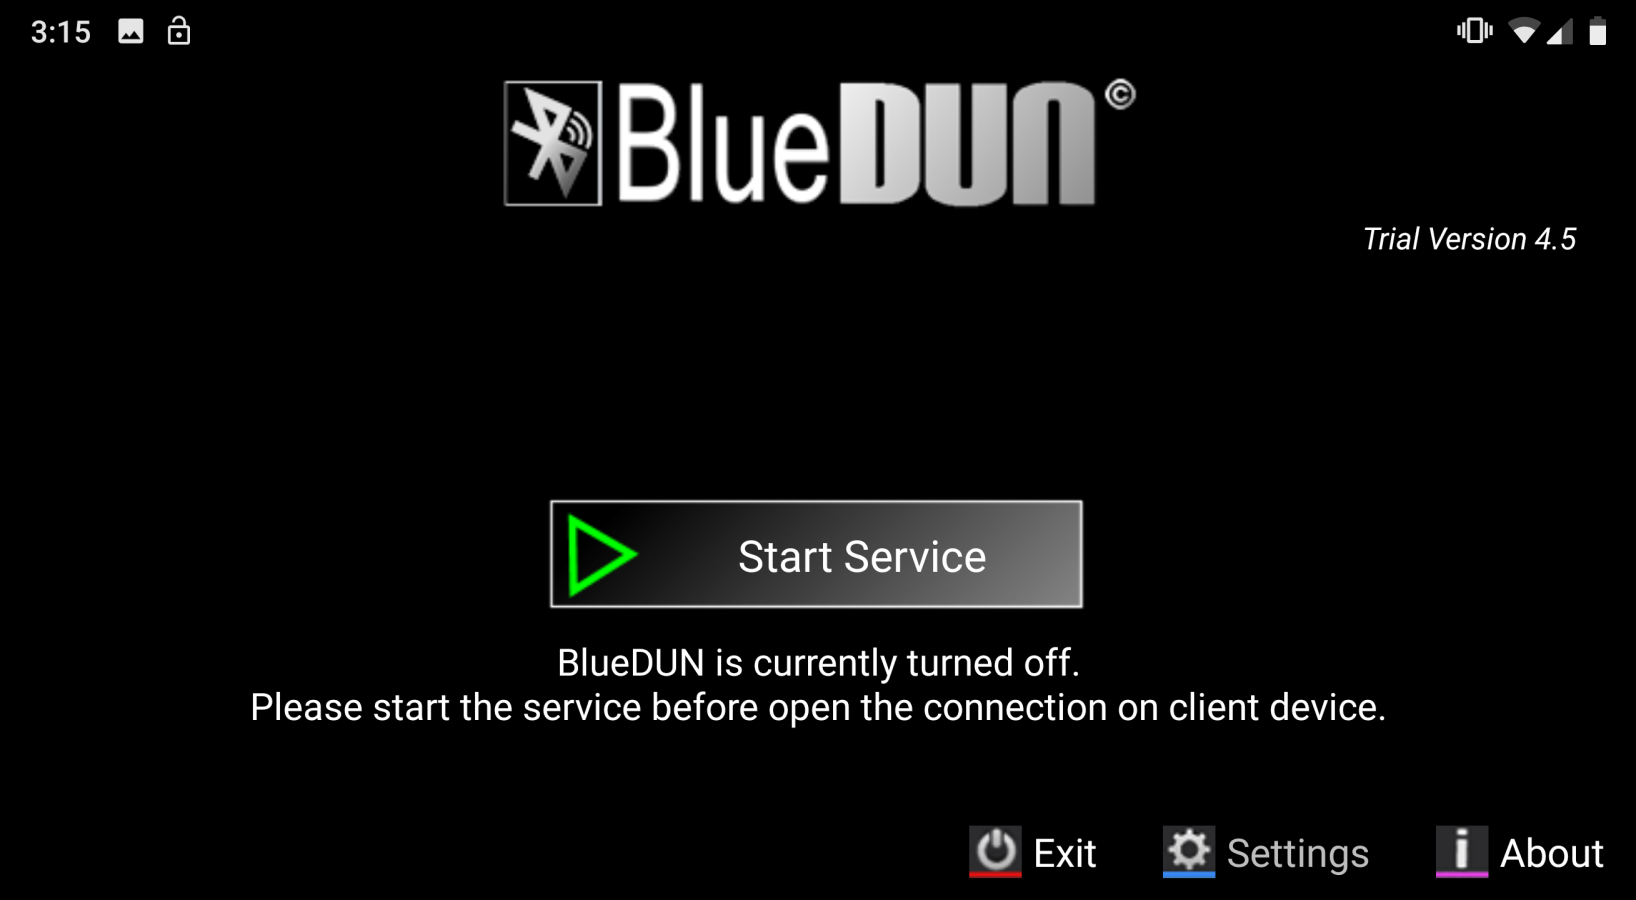
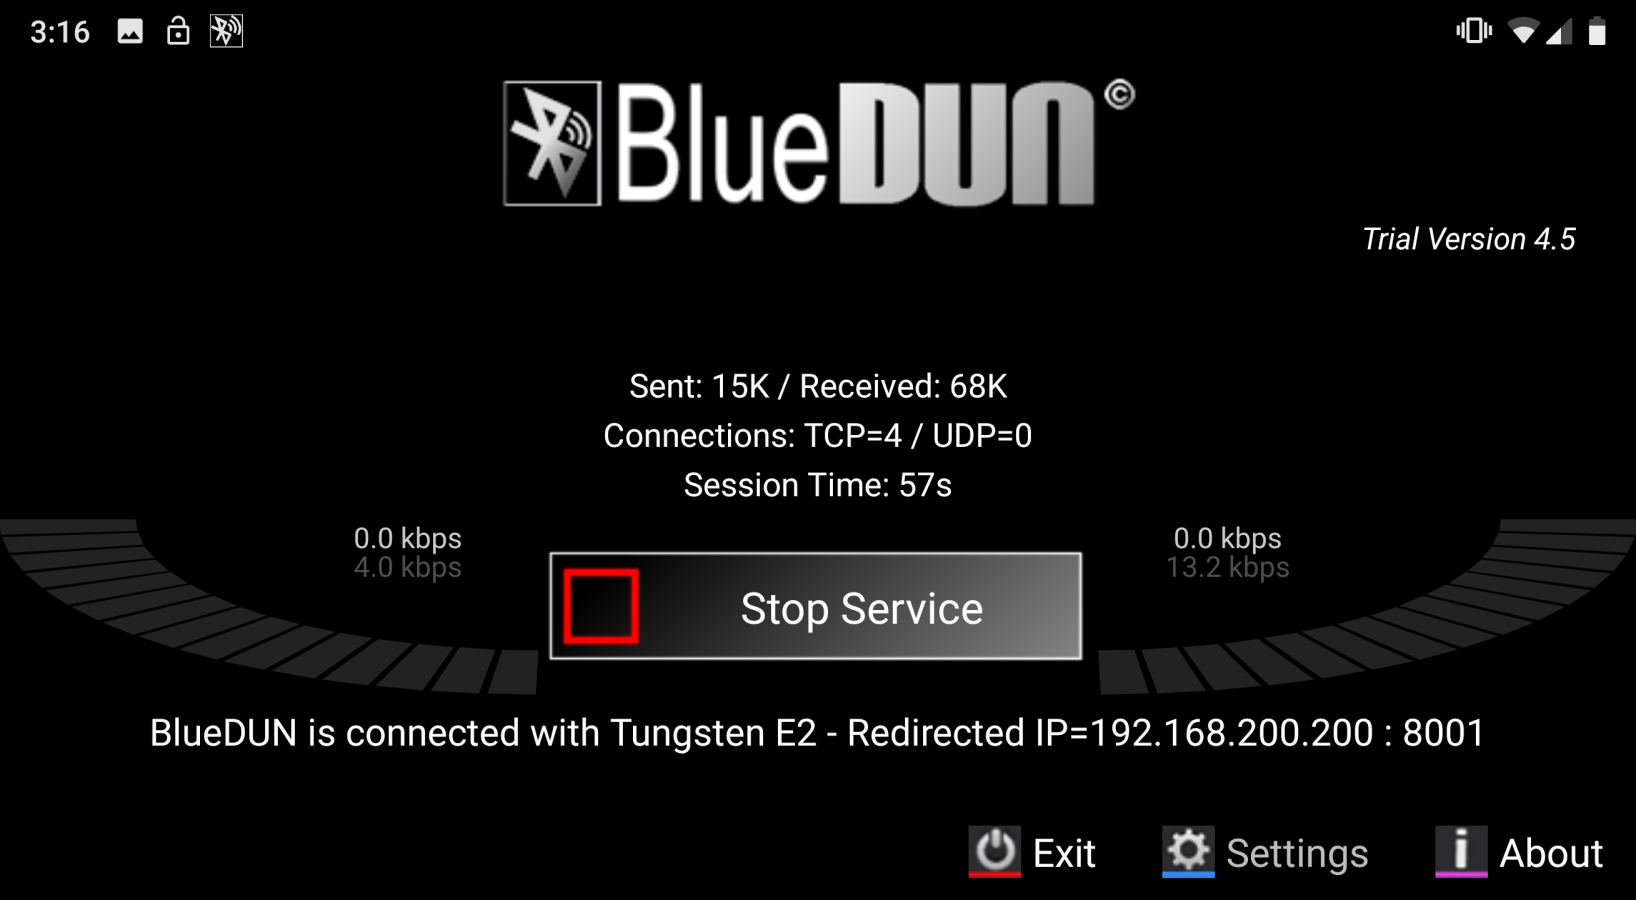
Now it's time to provide your Palm with a shared internet connection to actually connect to! For this guide, I'll be using the BlueDUN+ app because it is the simplest and most reliable option. Unfortunately, it isn't free. There is a free trial version which is fully functional, but is limited to 5-minute connections. Another app, SecureTether, provides the same functionality for free, but in my experience connections tended to fail within 5 minutes anyhow using this app. Your mileage my vary.
In any case, fire up the app of your choice and initiate the Bluetooth DUN service.
Step 4: Connect!
With the Bluetooth DUN service running on your Android device, you may now fire up a web browser on your Palm! A network connection will be attempted upon opening the browser, and with luck, authentication will complete within seconds. You should also begin to see a traffic monitor in the Bluetooth DUN app, indicating a connection is active.
Congratulations! You are now free to browse the internet on your Palm! Why not try heading over to lite.palmdb.net and downloading some apps, for starters?
Now, you may find that much of the modern-day internet refuses to load on the built-in Blazer web browser. HTML5 and HTTPS are now the standard, and Blazer supports neither. However, you may get better results using a third-party browser like NetFront or Opera Mini.
Enjoy the world wide web!
Notice
PalmDB is proudly hosted by fans for fans and is not affiliated with the former Palm Computing company or its current rights holders in any official capacity. While we are not able to provide official support, if you appreciate our efforts to keep Palm alive, please consider donating to PalmDB! Also, join the Discord community for discussion of all things Palm and Pocket PC!


