The following guide was submitted by community member Lulech23. Want to contribute? Submit your own guide for a chance to be featured!
One of the biggest challenges of making tiny computers has always been power, and Palm handhelds are no exception. Early models relied on traditional replaceable batteries, but the hassle, weight, and bulk added by this system made it clear a replacement was in order. For the Palm V, then-new lithium-ion battery tech was employed, which was thought to retain its capacity forever. As the years went by, that quickly proved not to be the case, and if you pick up a V or Vx today, it will almost certainly require a battery replacement to turn on at all.
Unfortunately, because Palm didn't foresee the need to replace the built-in battery, these devices were not designed to be disassembled. To achieve the sleekest form-factor possible, screws were eschewed in favor of a resin-type adhesive glue used to join metal front and back plates to a central plastic frame. That choice of adhesive is important, though, as it makes non-destructive disassembly possible, just a bit inconvenient. That being said, let me put a disclaimer right here and now:
Warning: This guide involves methods which can permanently damage your device and even injure you. Proceed with caution and at your own risk. Take your time, and when applying heat, remember that you can always apply more, but you can't unapply it. PalmDB accepts no responsibility for failed attempts to follow this guide.
Prerequisites
- A Palm V or Vx with a dead battery
- A replacement battery. At the time of writing, these are still readily available on Amazon and eBay. PalmDB recommends Cameron Sino for replacement Palm batteries!
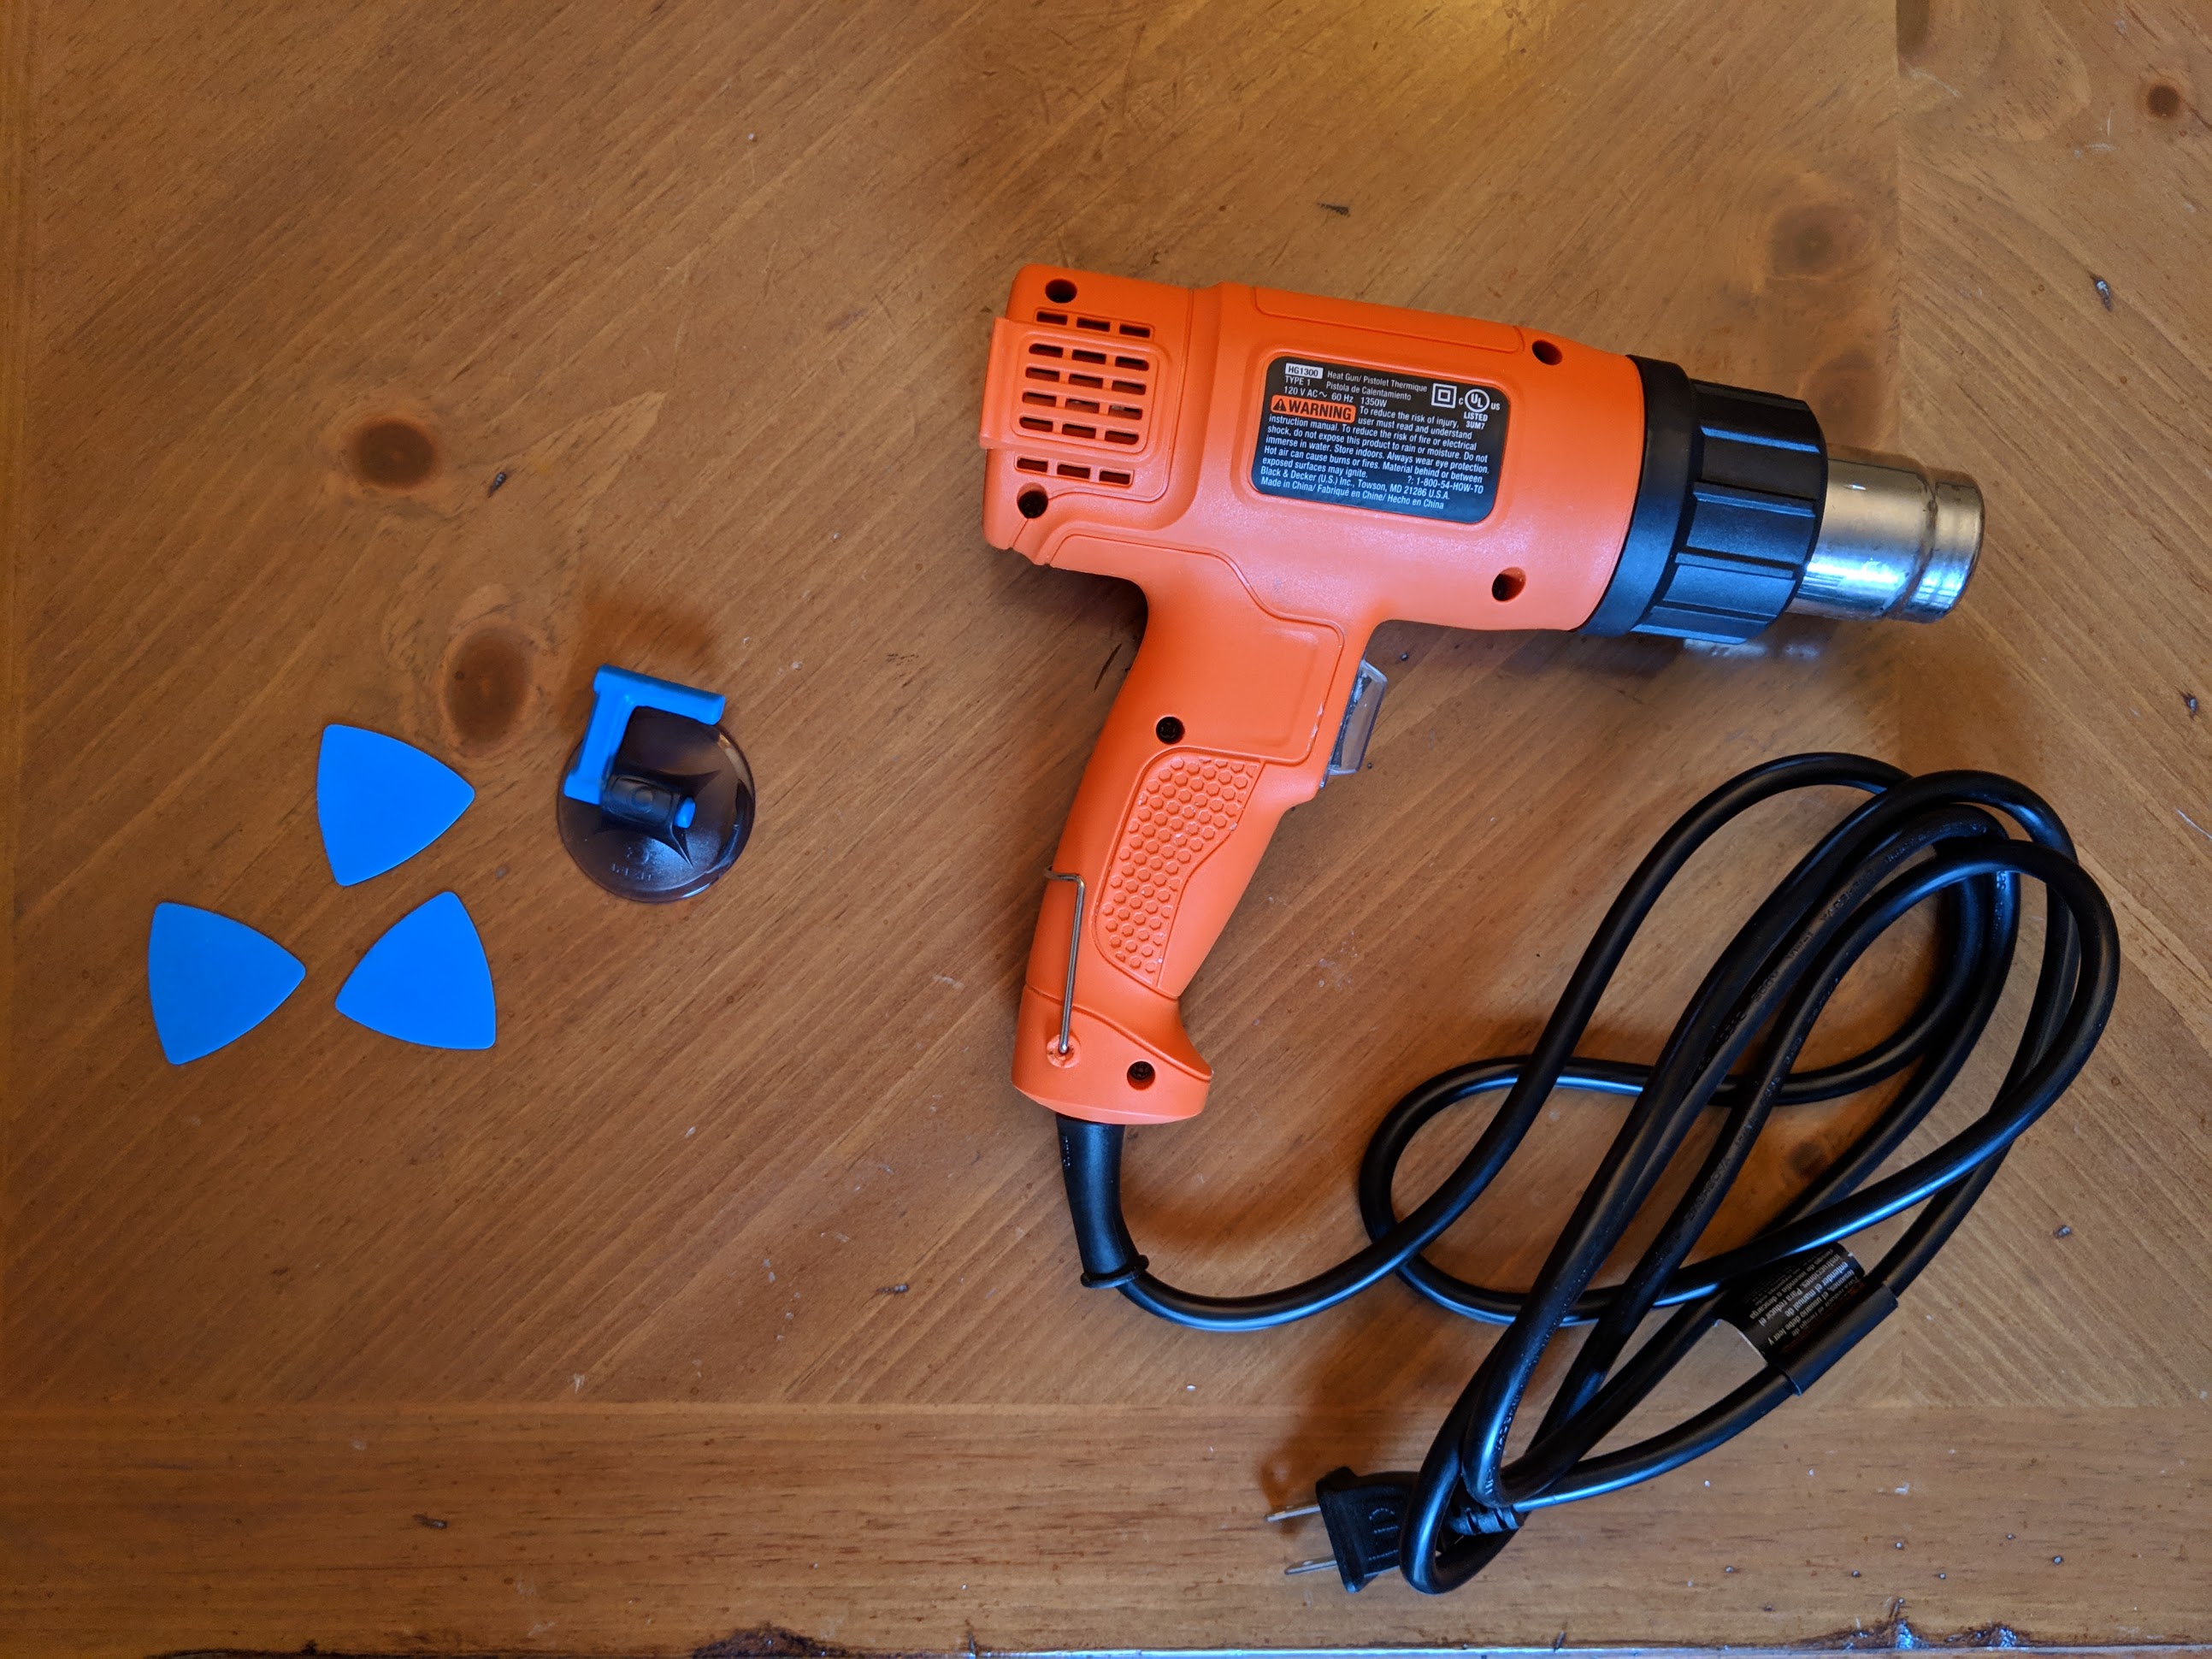
- A low-powered heat gun or high-powered hair dryer
- Plastic separators, such as those picks sold by iFixit. Guitar picks and plastic cards can also substitute
- Important! Do not use metal tools for this, as you will almost certainly damage the Palm casing.
- A suction cup, such as those sold by iFixit. This is for your own protection from heat, so any alternatives you can come up with are also acceptable
- Scissors
Replacing the Battery
To get inside a Palm V, we'll need to carefully melt the resin adhesive running along the outer edge of the frame—without melting the rest of the components. If you think I'm joking, think again. Particularly vulnerable areas include the front face buttons (these melt easily) and the glass screen. Don't worry too much about the electronics, as they're fairly resilient, but be very careful not to blow heat anywhere on the front of the device.
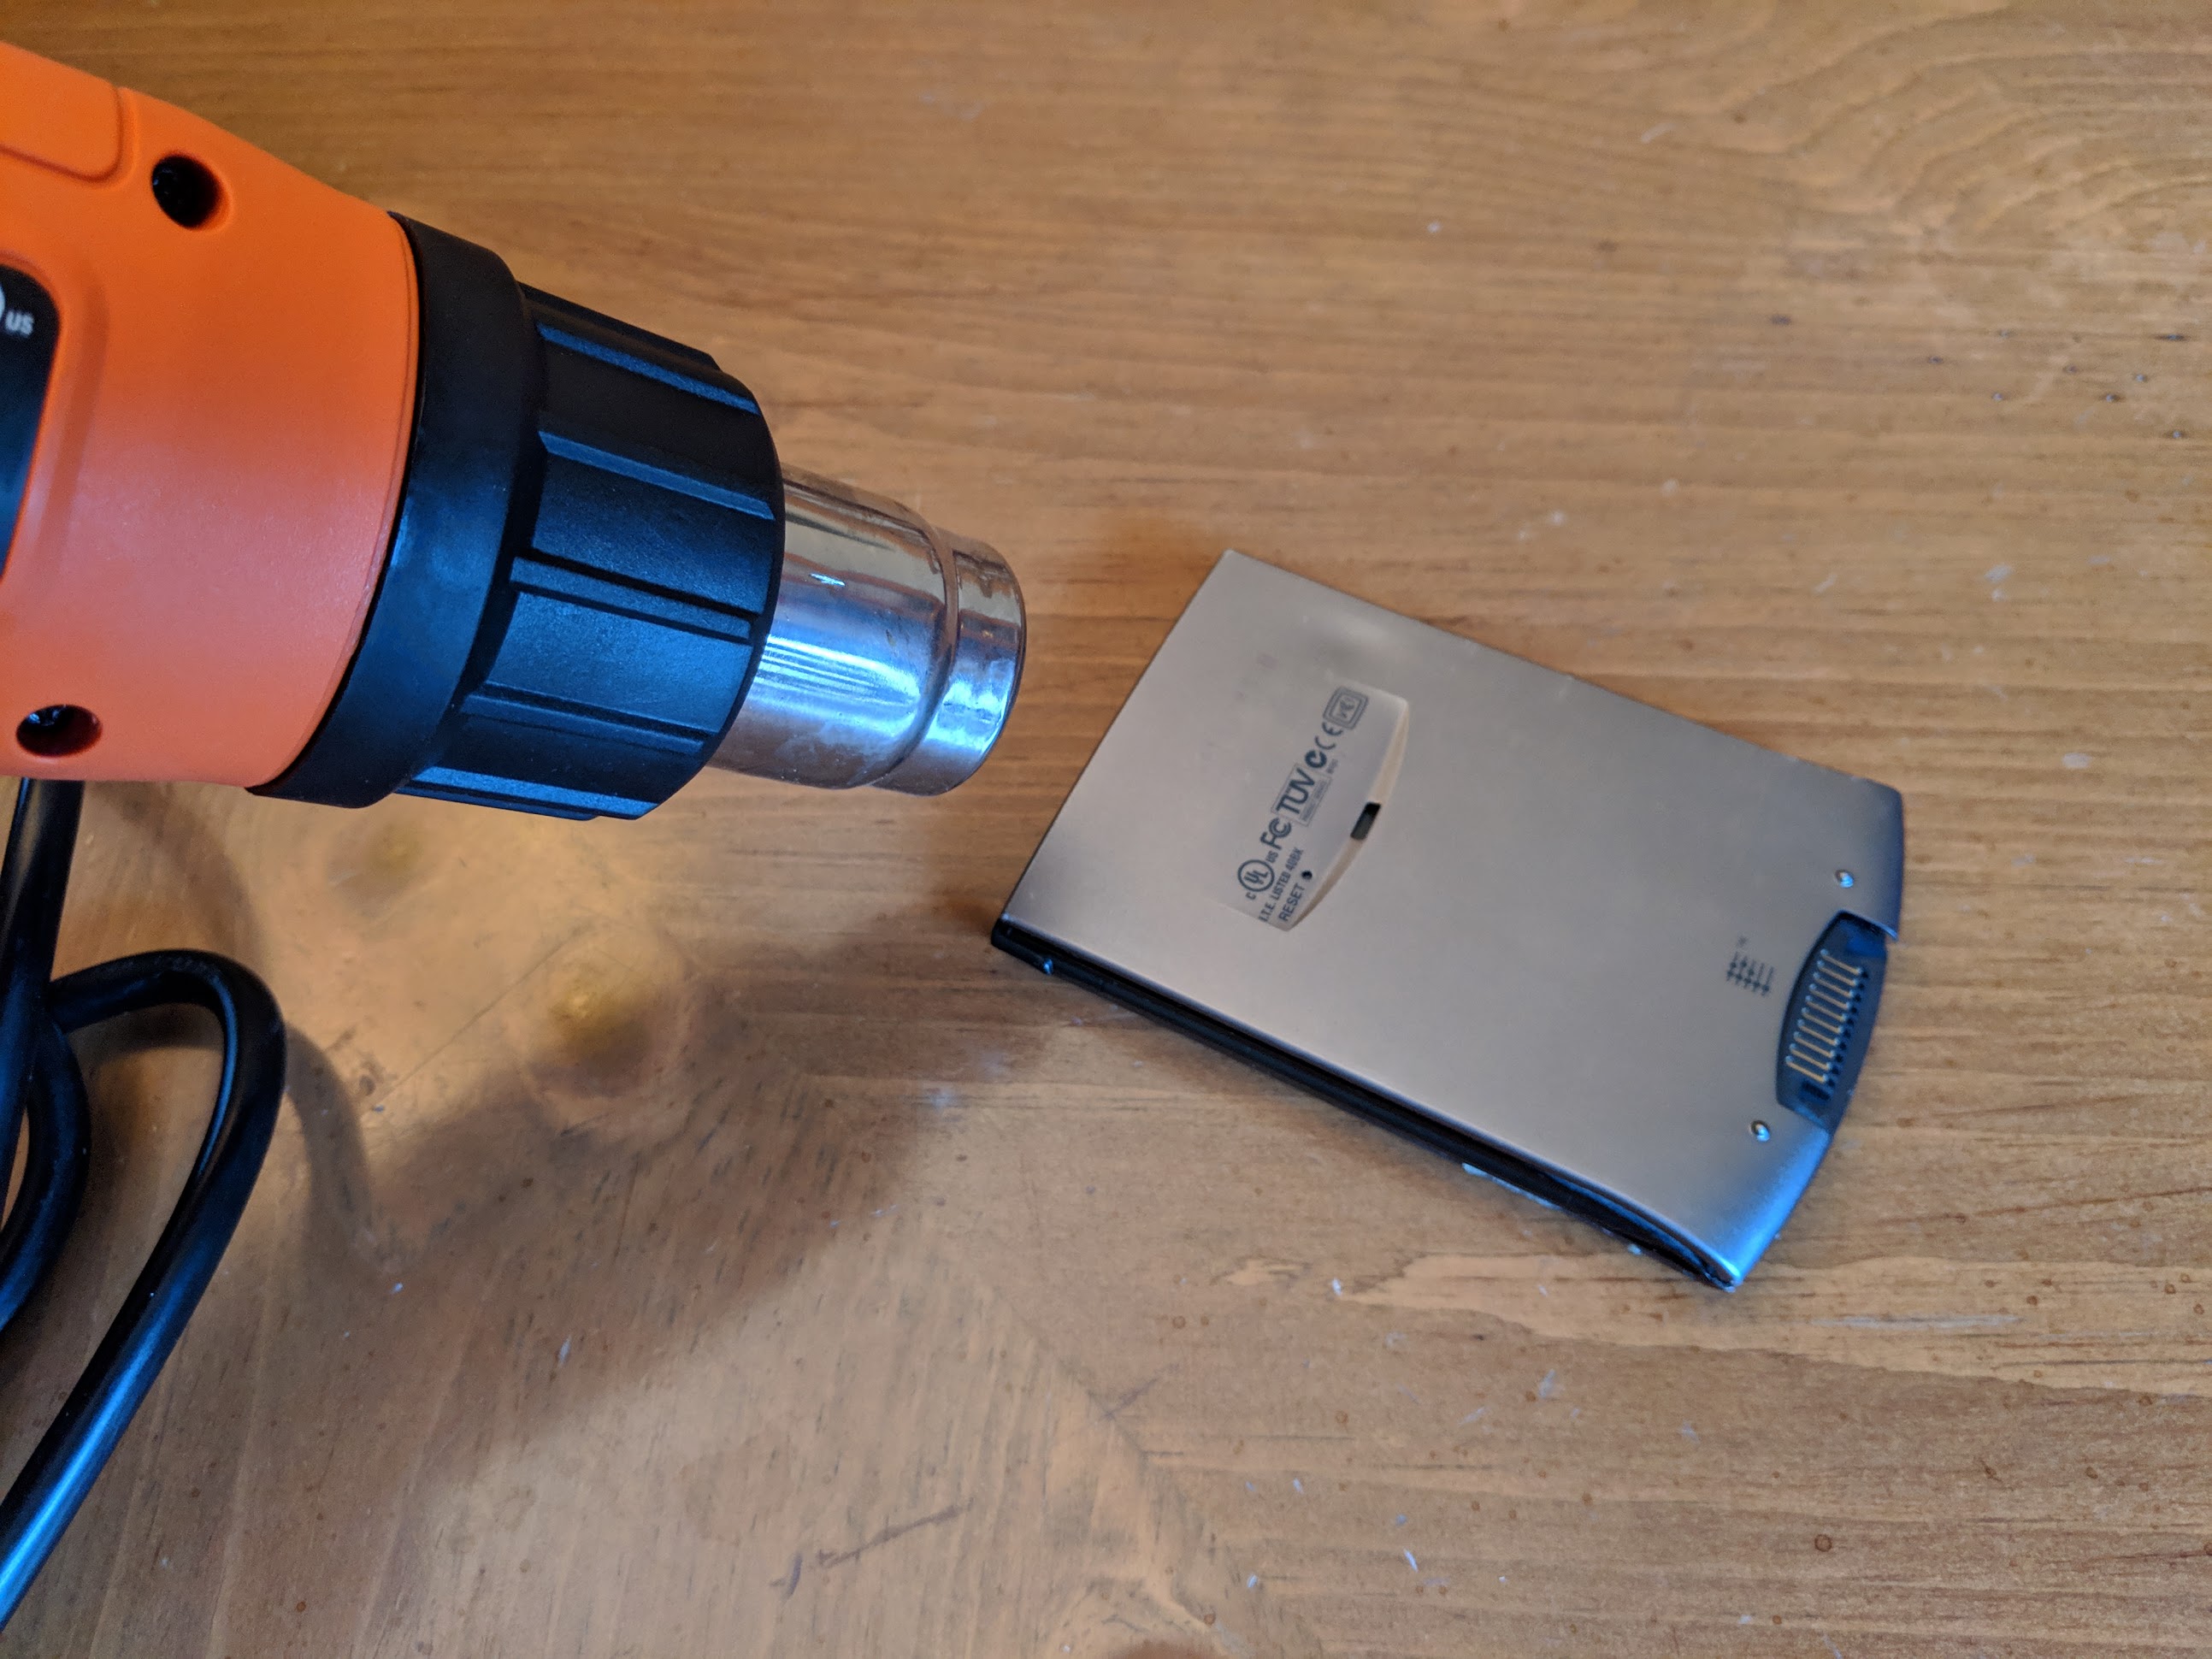
Start by laying the device face-down on a smooth surface (so as not to scratch it) and begin by blowing some heat along the top edge. Thankfully, the metal backplate transfers heat pretty well, so it shouldn't take long for the adhesive inside to soften. Wave the heat gun or hair dryer back and forth along the edge to avoid concentrating too much heat in any one location.
Important! I highly recommend starting with the top side because it is farthest from the face buttons and also provides the easiest insertion point for prying off the backplate, as you'll see in a moment.
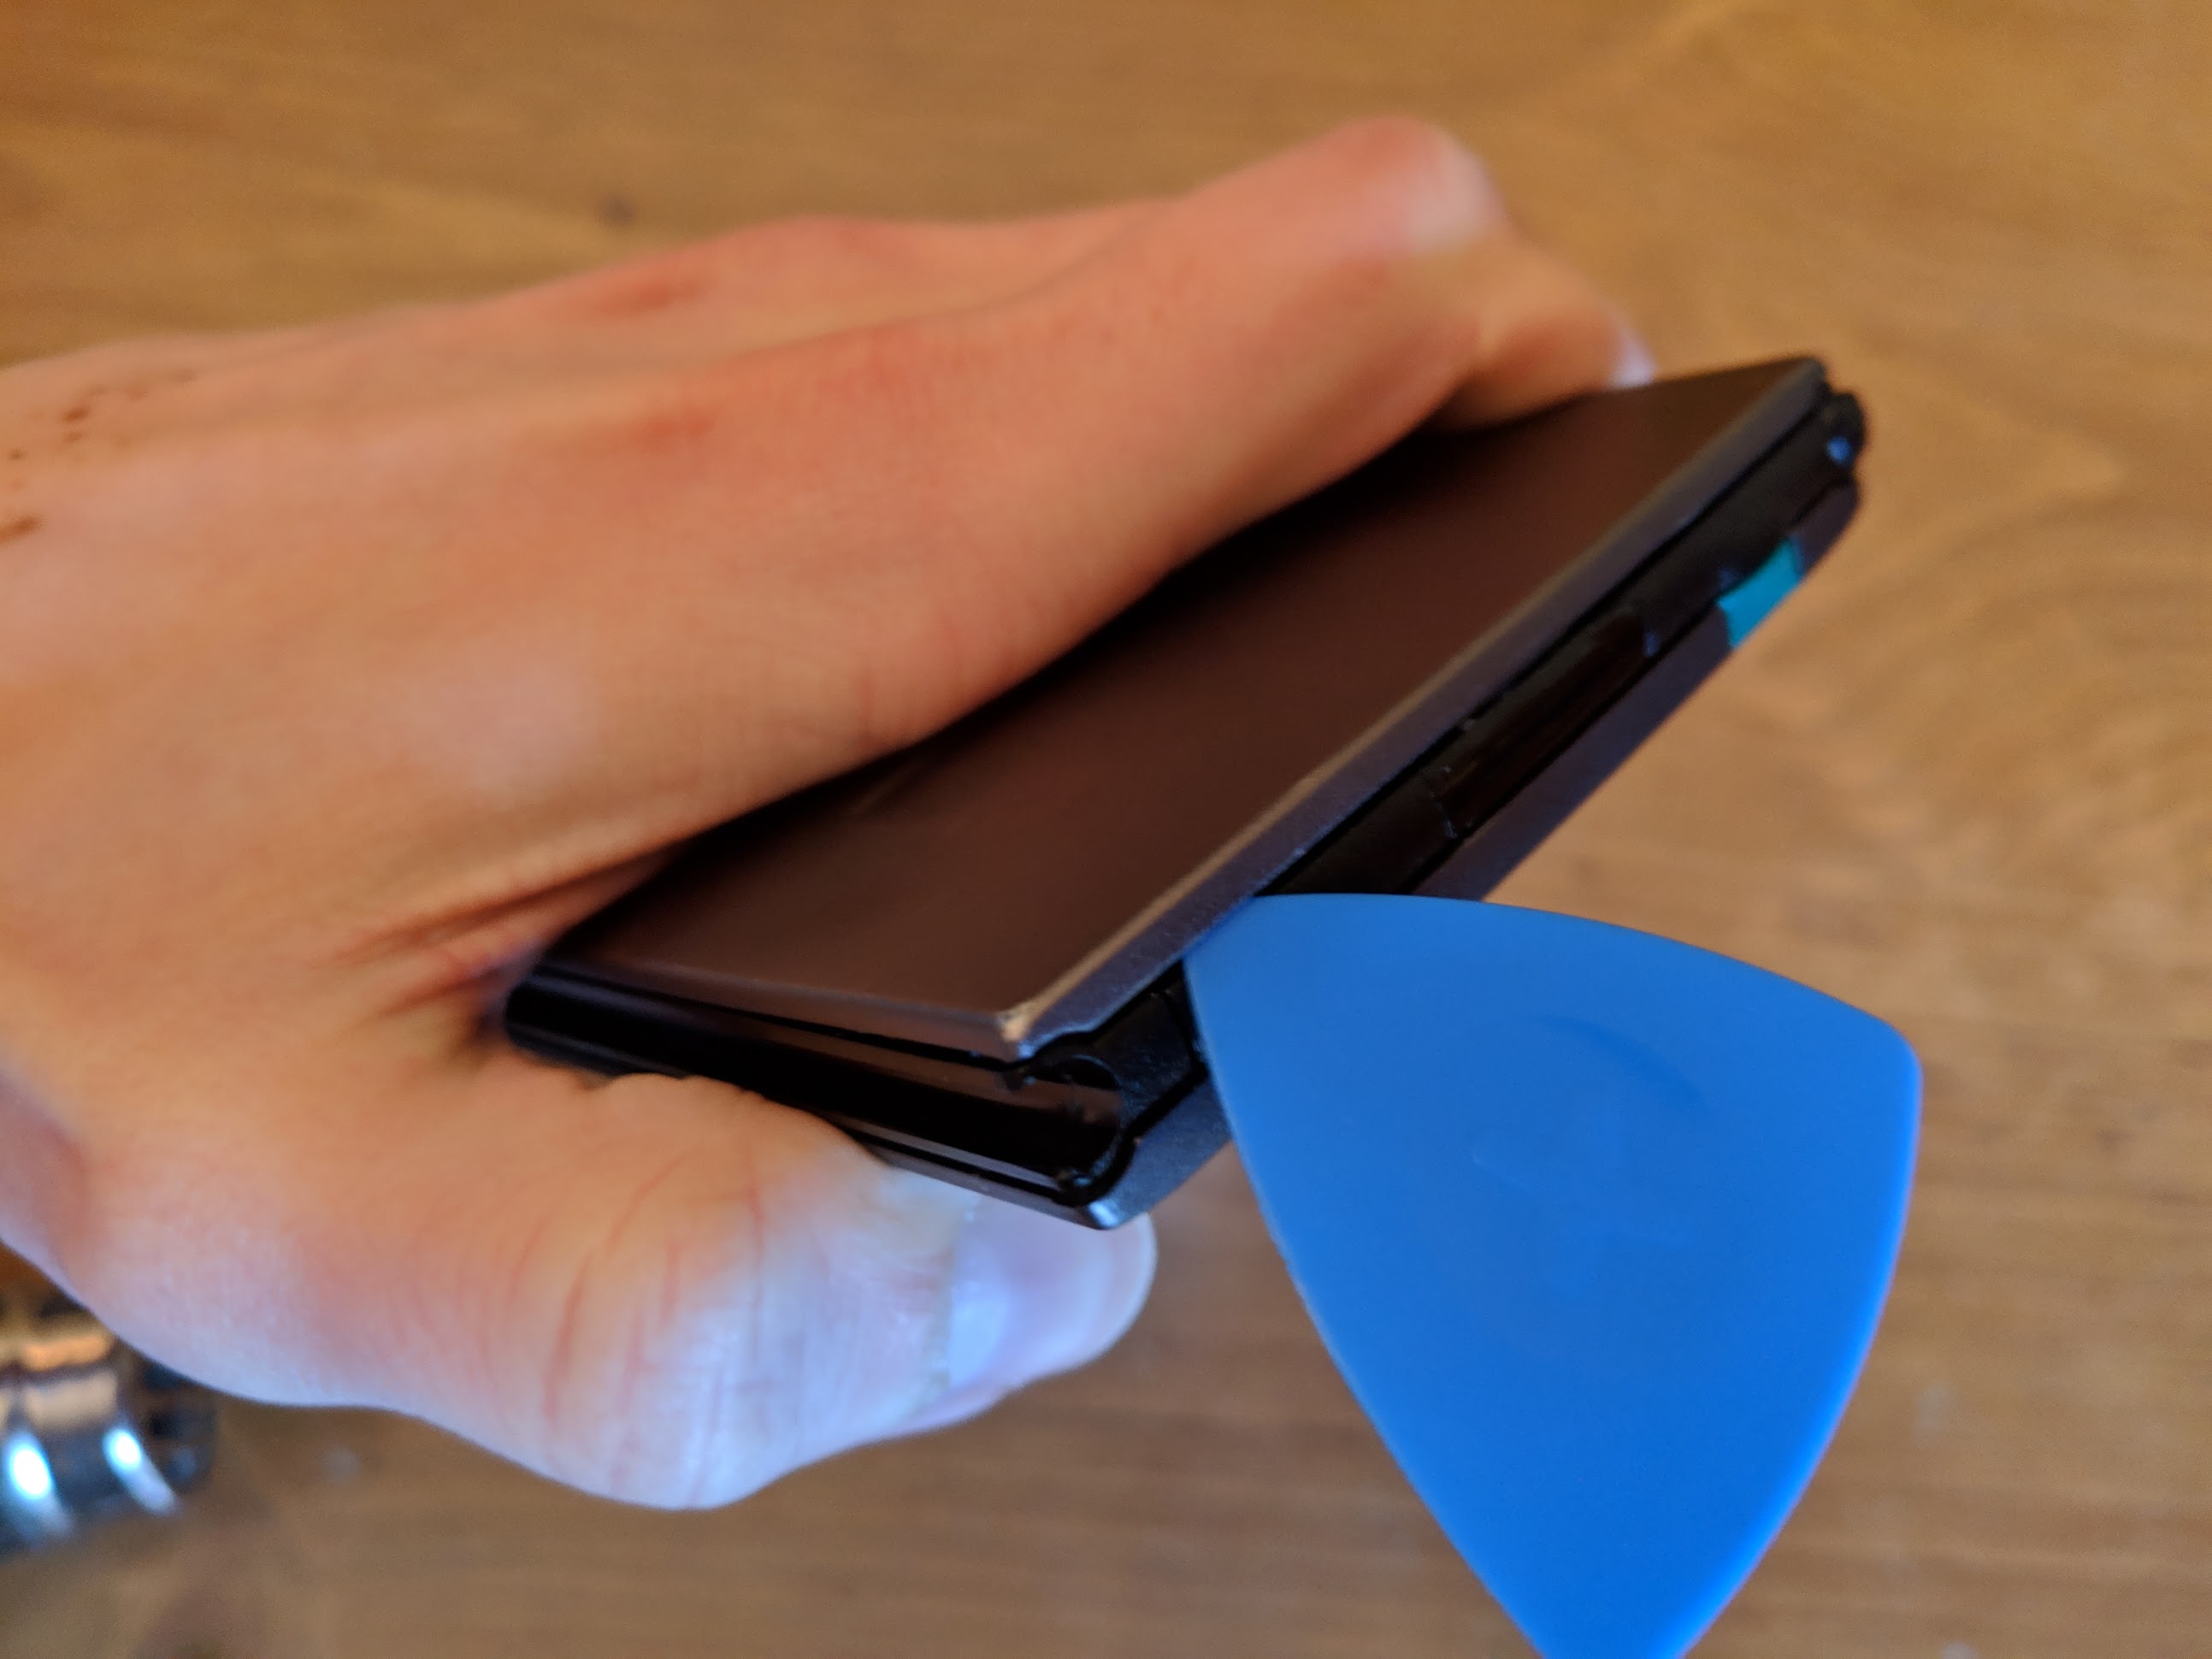
After heating the top edge for a few seconds, use the suction cup to hold on to the device without burning yourself (it will be hot!) and ready a plastic pick.


Your target is the contrast button, as seen on the left in the photos above. Press the contrast button in and insert the pick into the gap between the plastic frame and the metal backplate. Some force will be required, but it should go in fairly easily. You will feel a gummy resistance as the adhesive gives way. If you don't, apply heat for a few more seconds and try again.
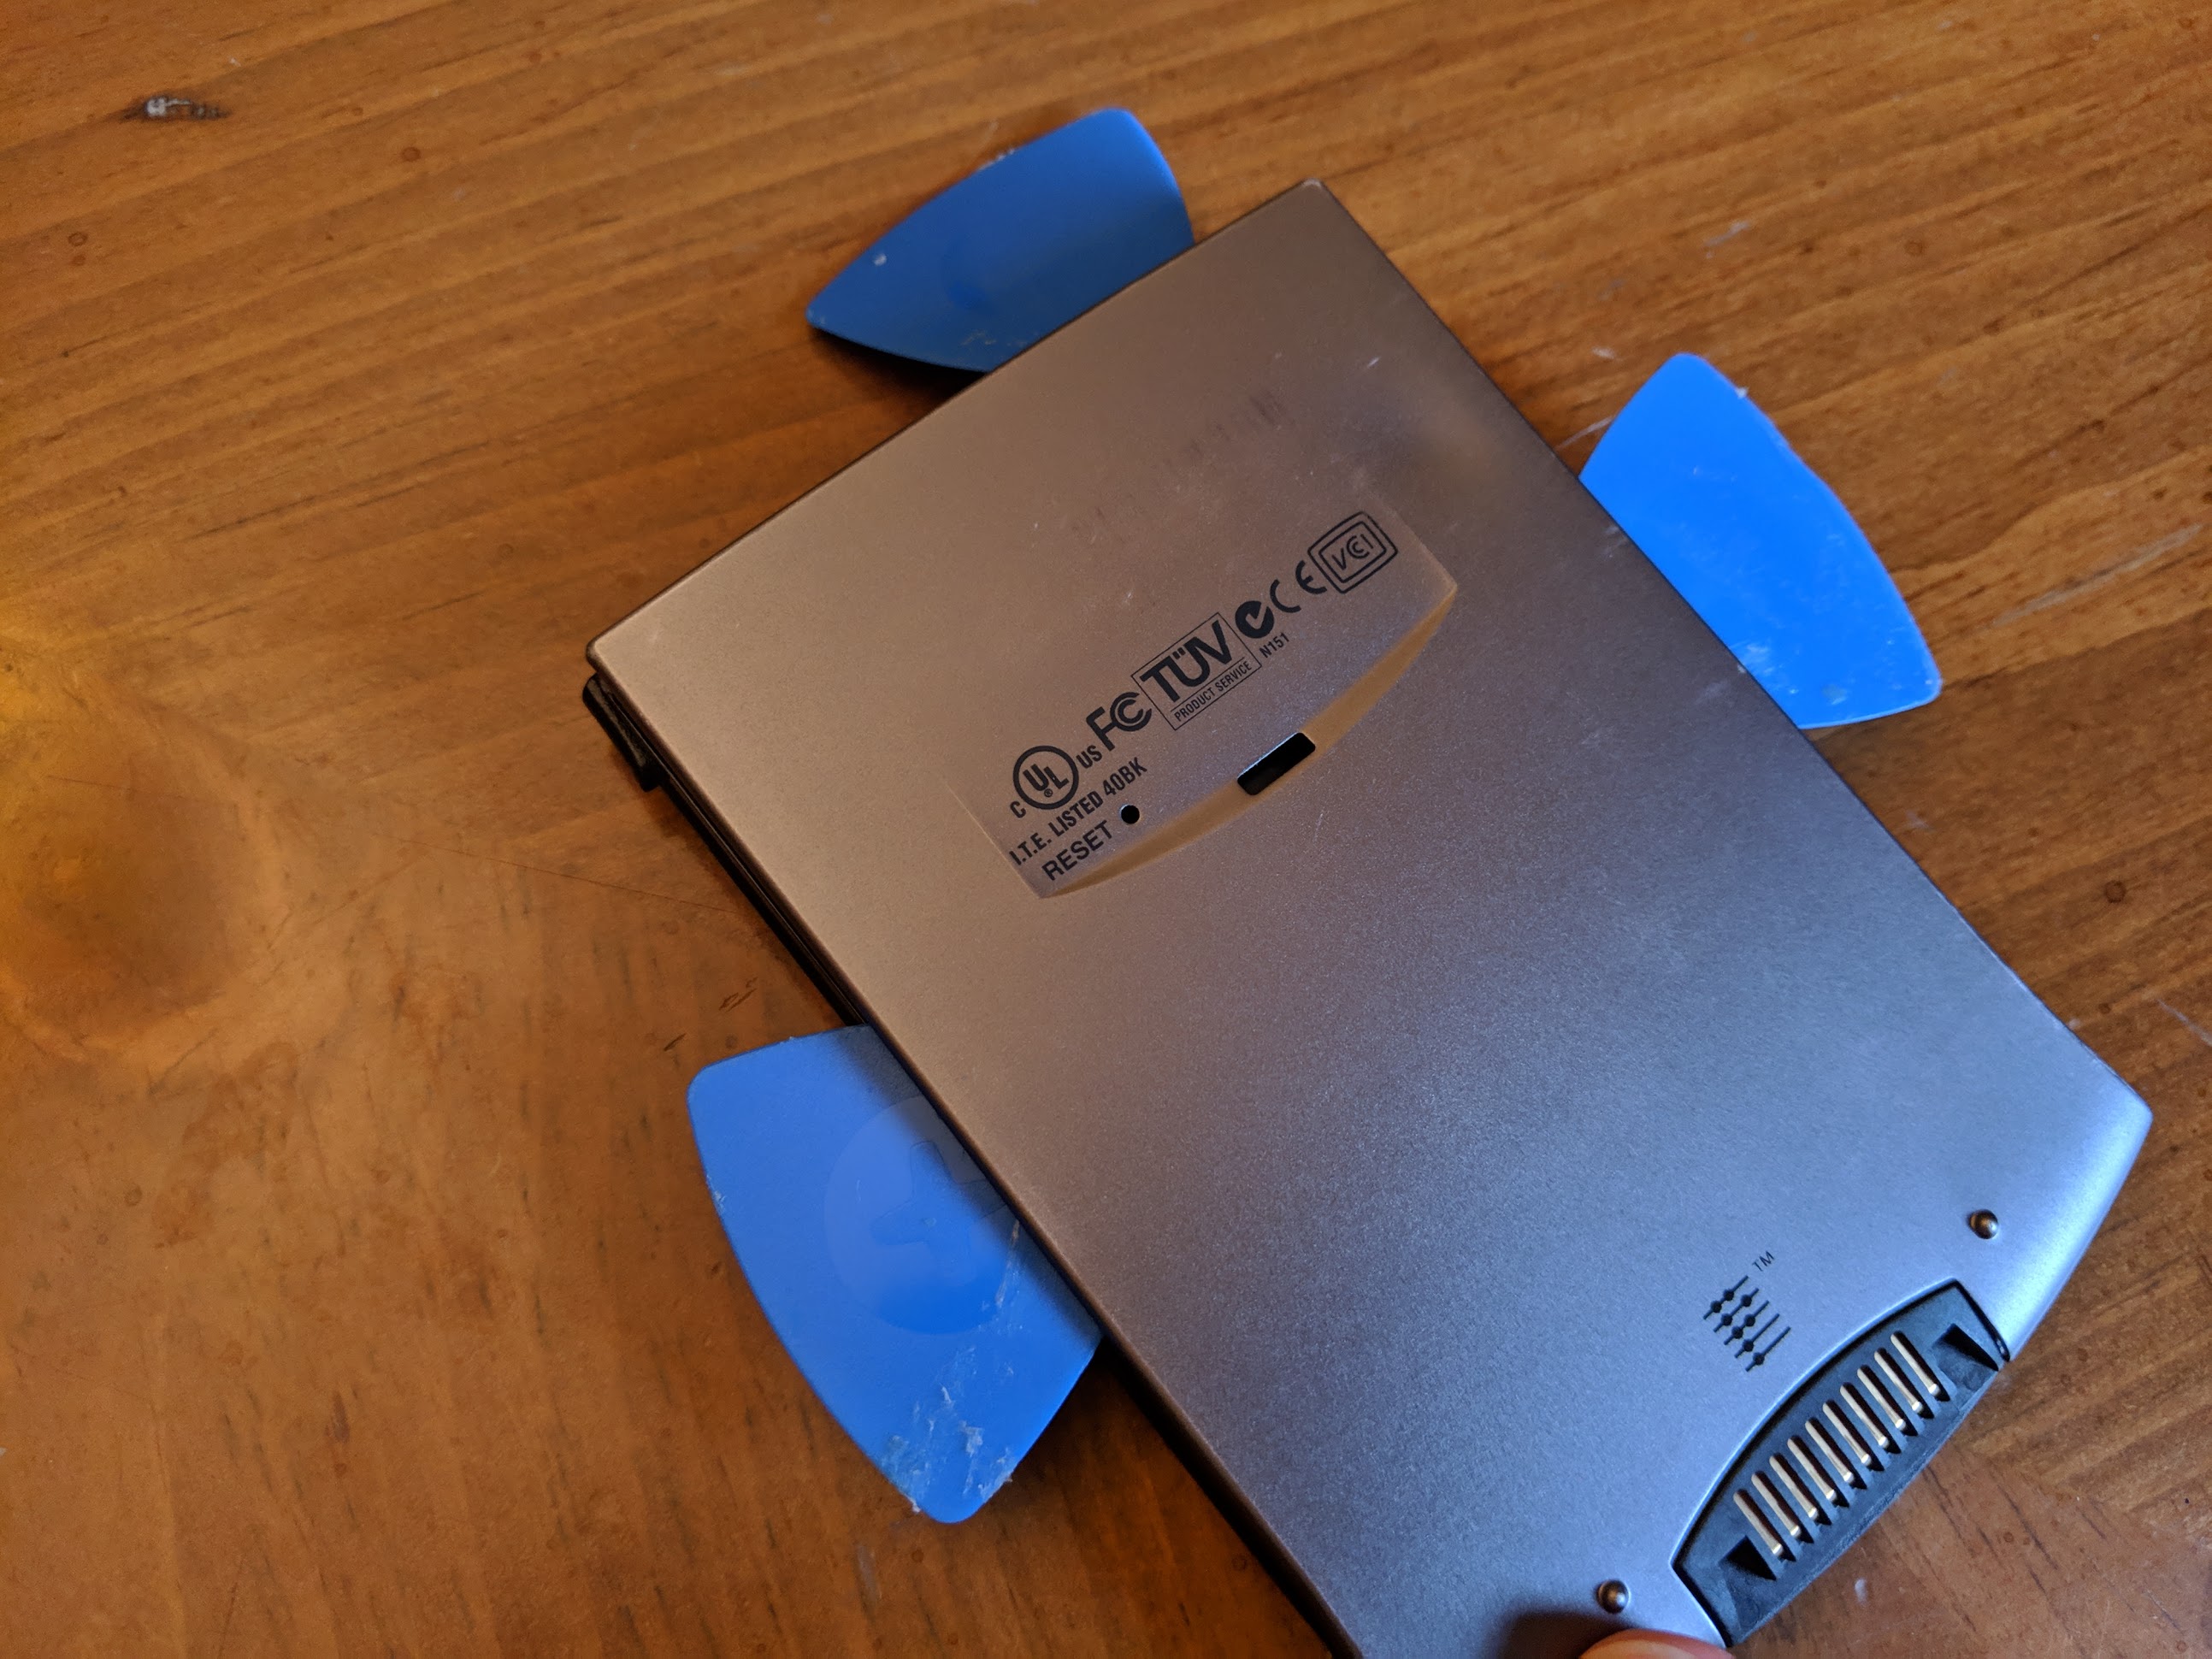
Once the pick is in, slide it around to one side of the device until you reach a cold area where the adhesive is still firm. Apply heat to this side, again waving the heat gun/hair dryer across the entire edge. It should be easy to tell when you've done enough this time, as the pick will start to go limp when the backplate separates.
Continue sliding the pick along until you've reached the bottom corner, then grab another pick and repeat the same process for the other side. You might also want to stick a third pick in the original insertion point to prevent it from sealing back together.
Once all three sides are pried open, carefully pull the backplate from front to back. The adhesive on the bottom edge next to the HotSync connectors will likely still be pretty firm, but you shouldn't try to heat it. Because the bottom of the unit is curved, any heat blown here will curve around and impact the face buttons. Also be careful not to warp the backplate as you pull. Remember, heating metal makes it malleable too, and any warps will make reassembling the device later more difficult.
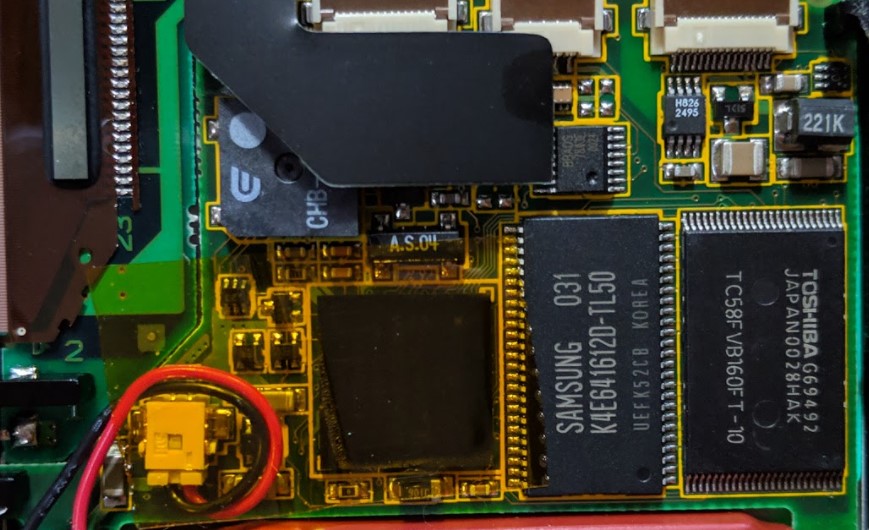
With the backplate removed, you'll at last be greeted with the internals of the Palm V (or Vx, as shown below).
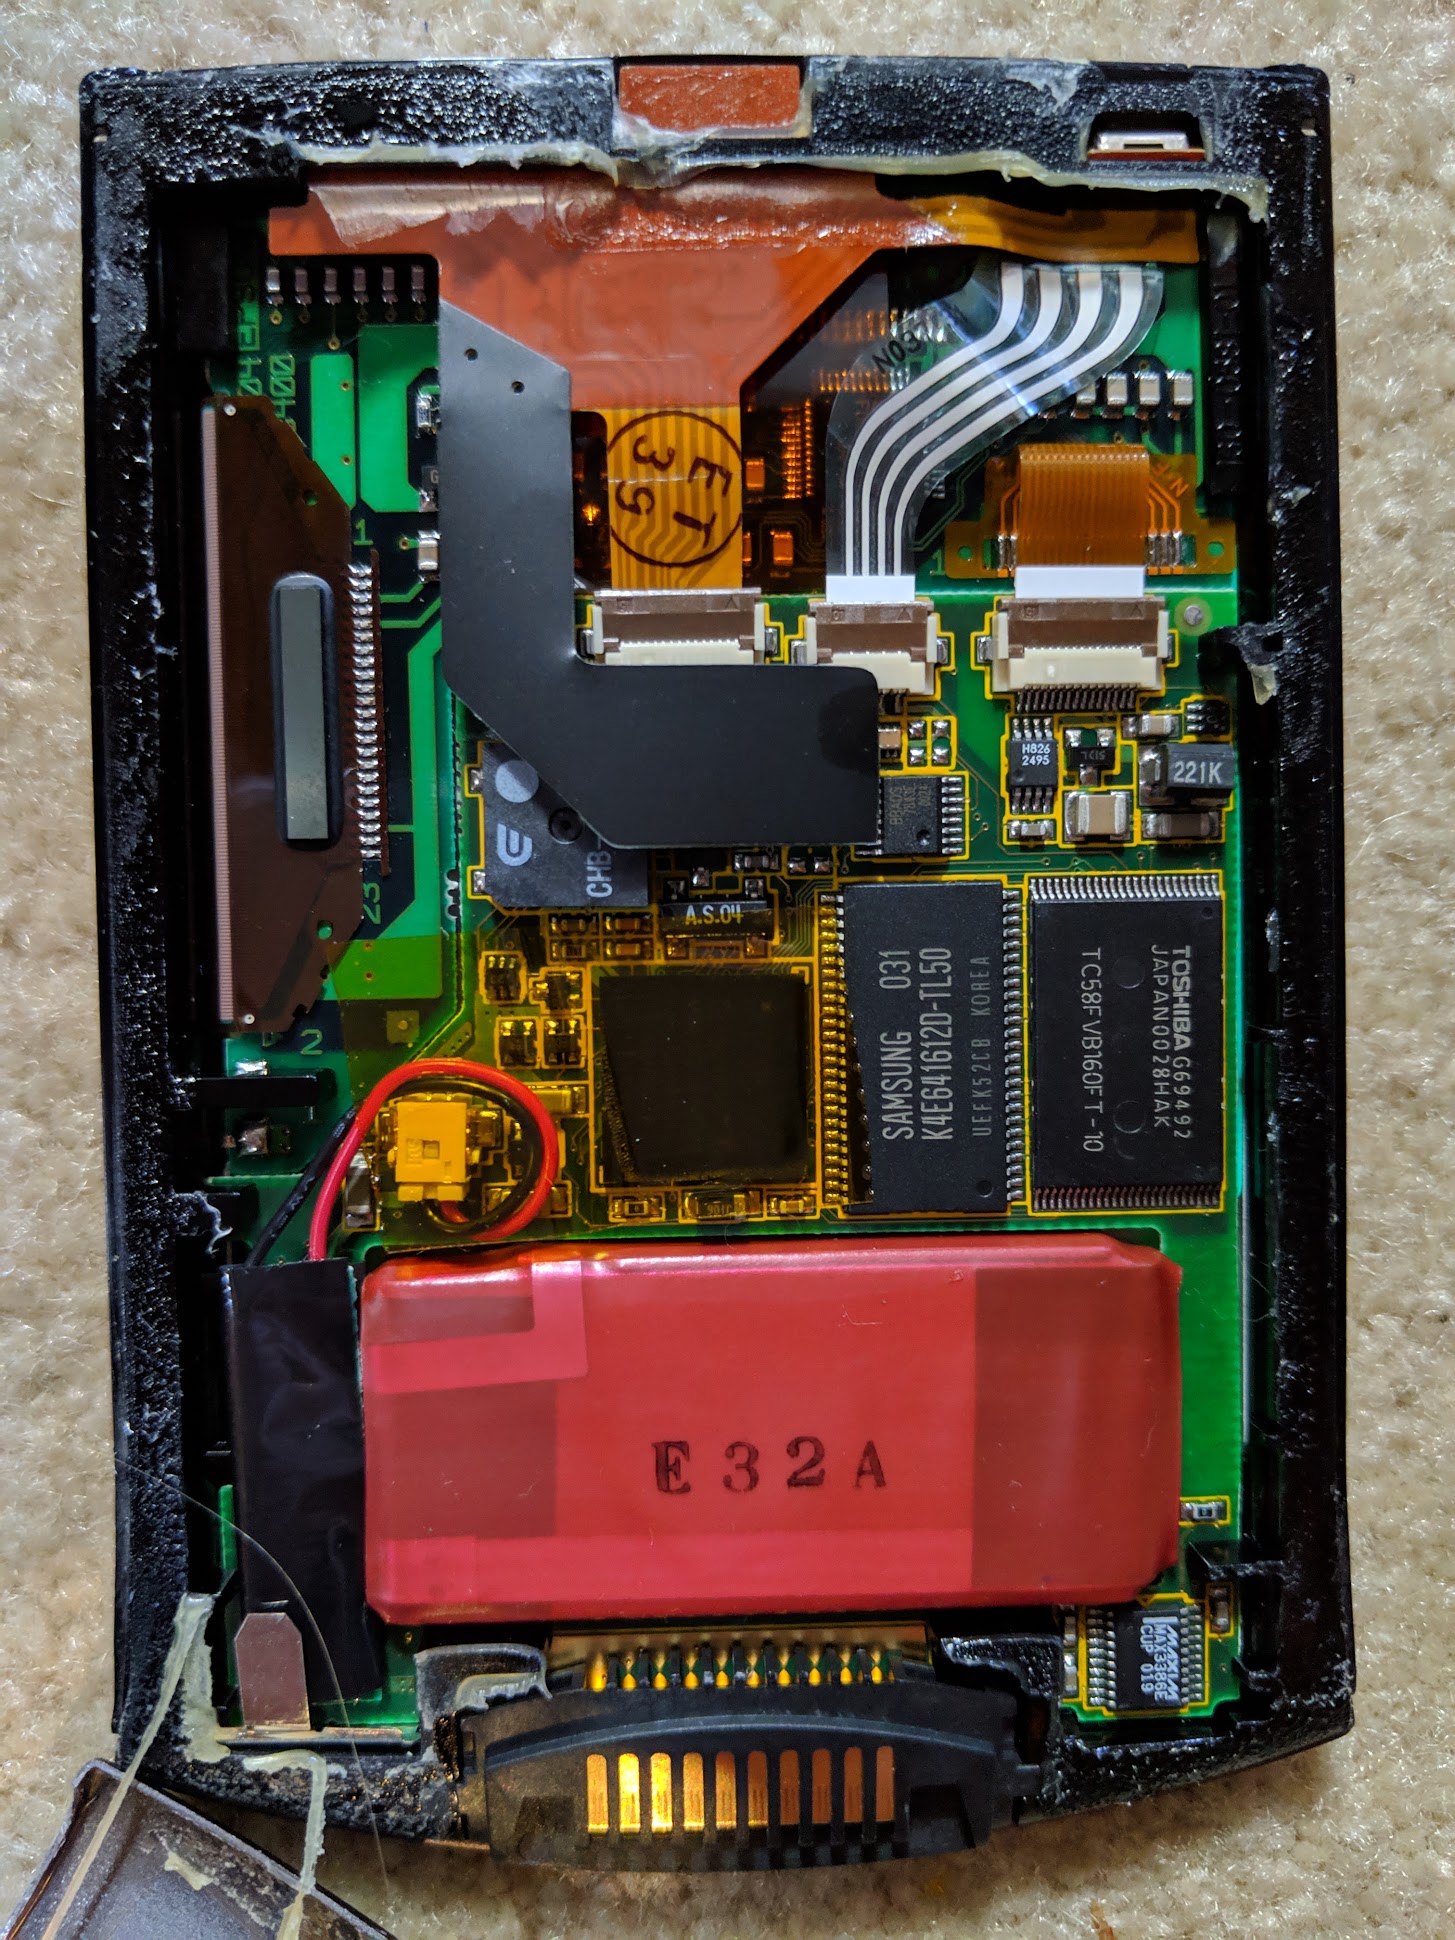
The battery is contained in a red plastic wrapper which is glued to the screen assembly. That's right, the screen. The Palm V's electronics are separated into multiple layers which leaves a gap for the battery, minimizing the device's overall thickness.
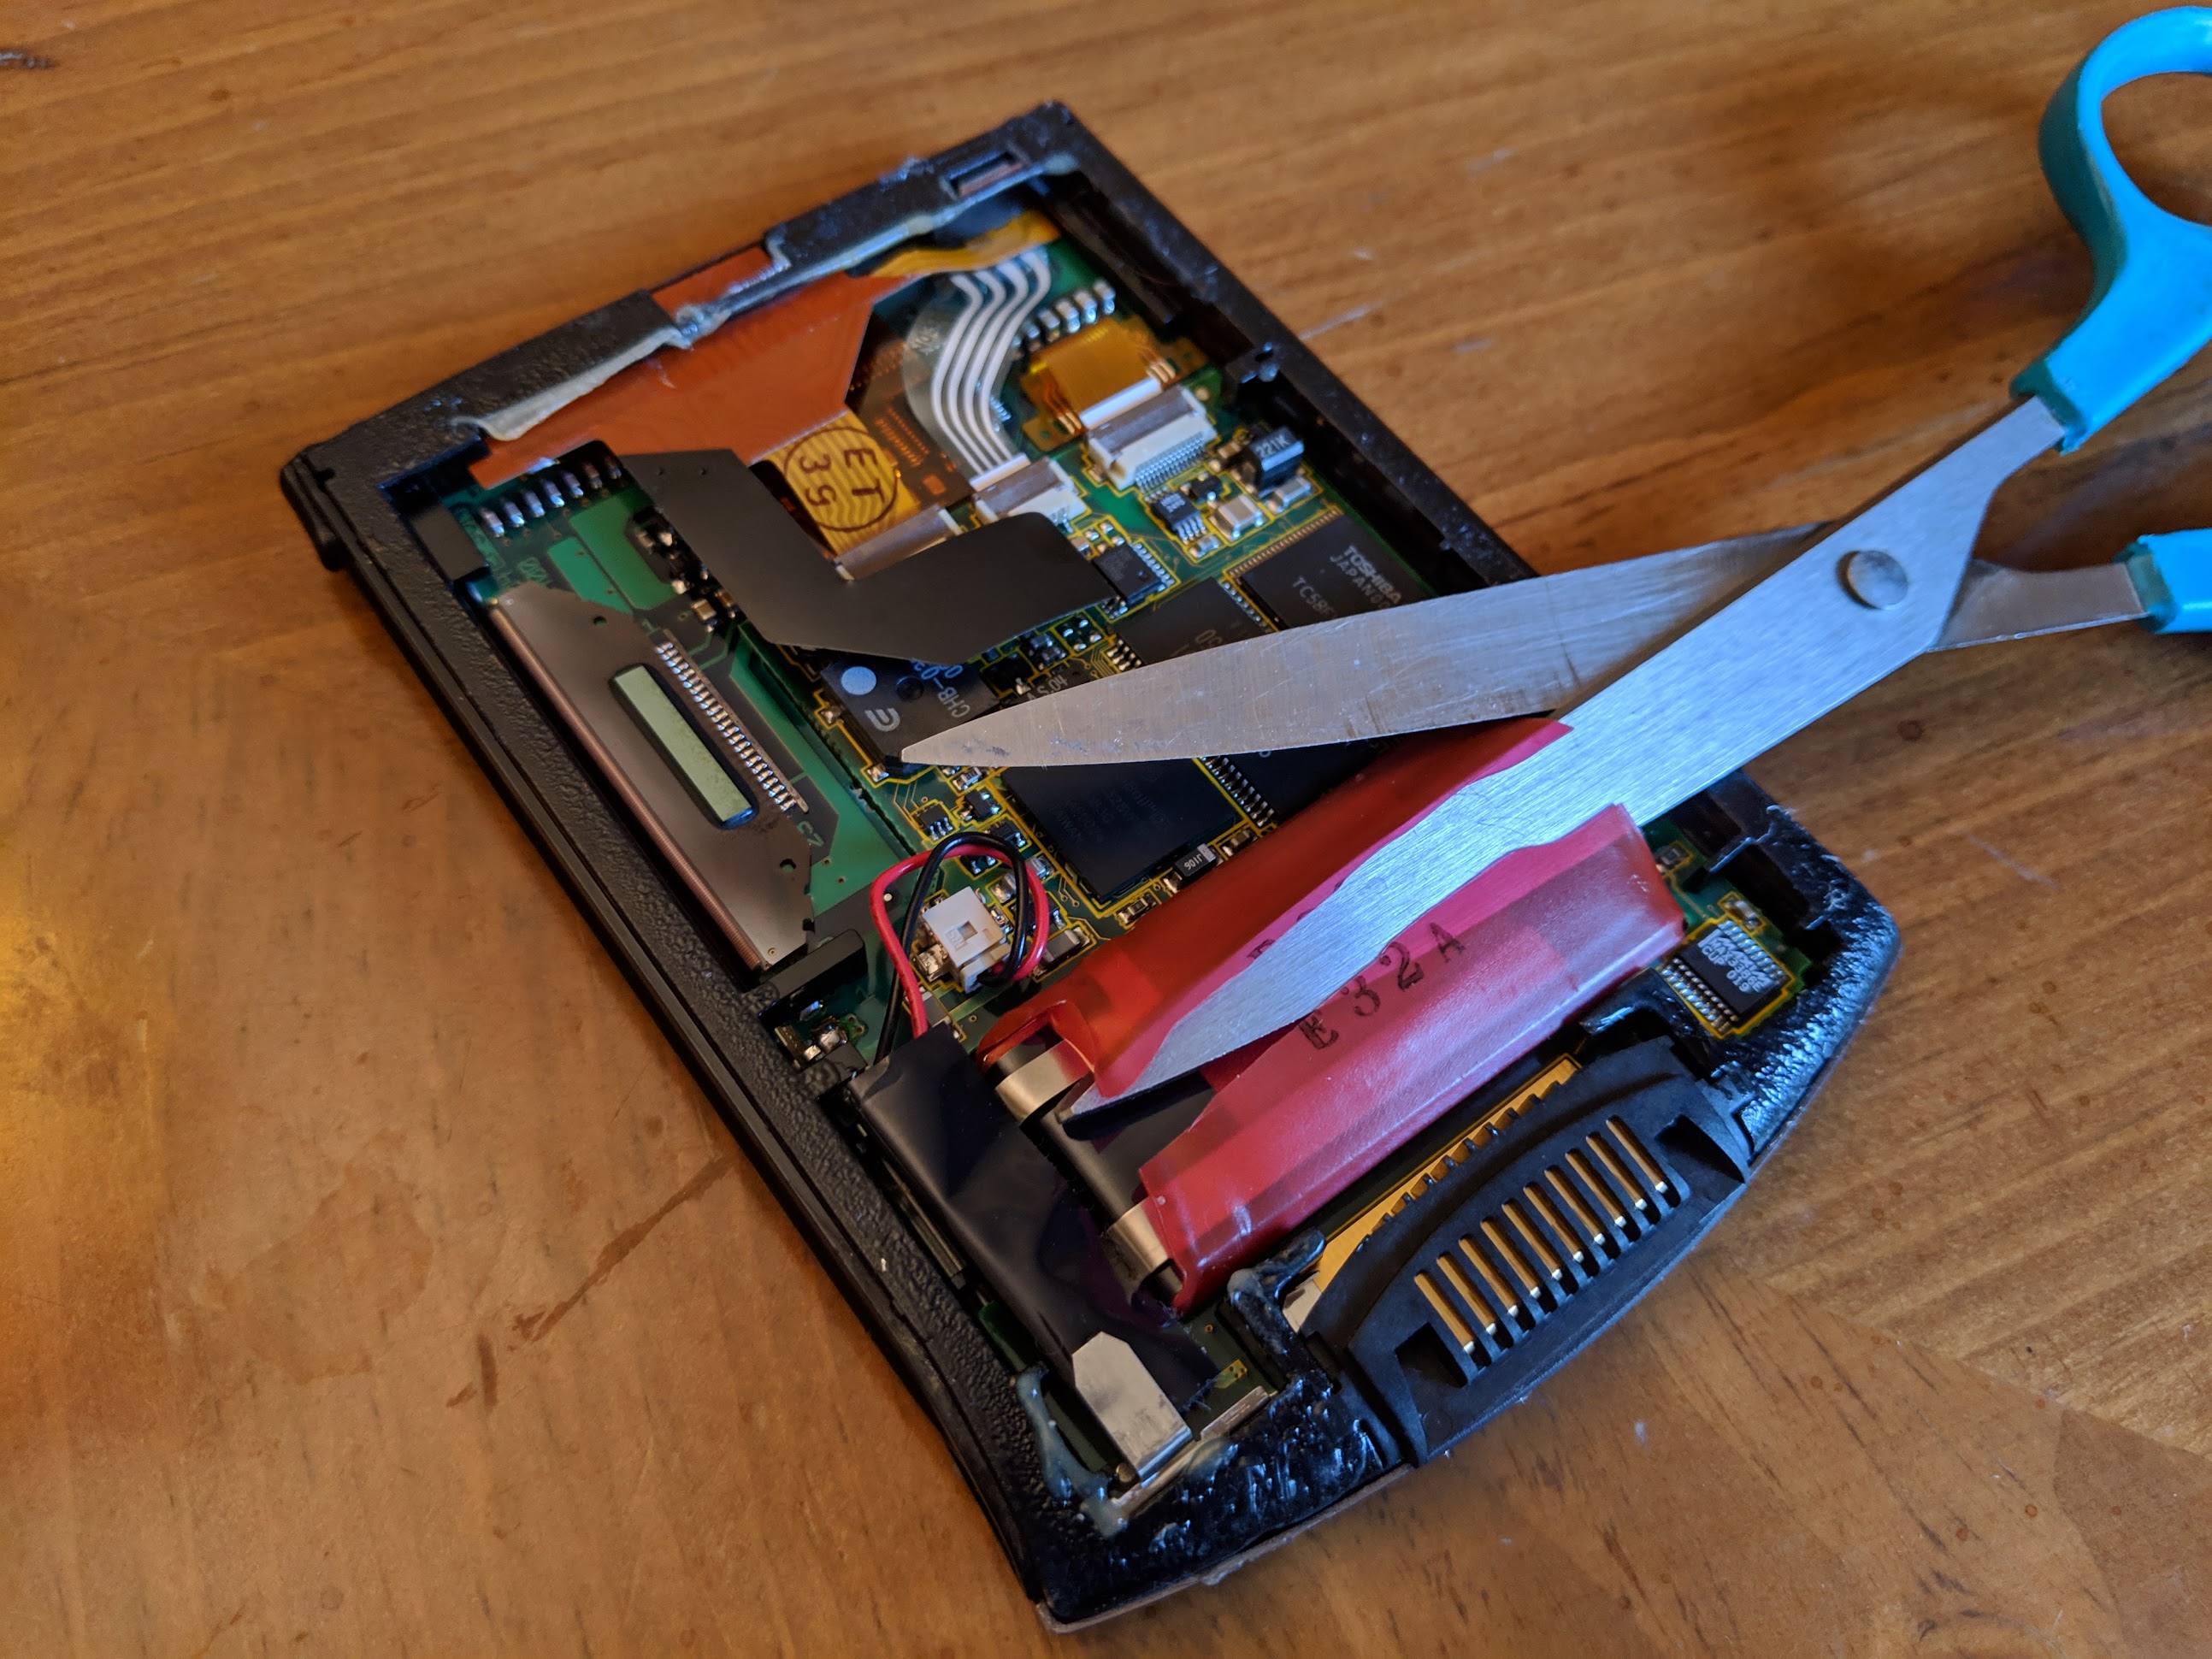
Now, whatever you do, do not try to pry the battery out. The Palm V's display assembly is fairly fragile and the glass will likely crack if you apply too much force. While you could continue disassembly and use heat to melt the battery package adhesive, I strongly do not recommend this. Instead, simply take a pair of scissors and carefully cut through the plastic wrapper without puncturing the battery itself.
You'll notice the original battery also houses some components in a black wrapper off to the left. This is held down by a metal clip at the bottom of the Palm V casing, but you can safely bend this up and out of the way for now.
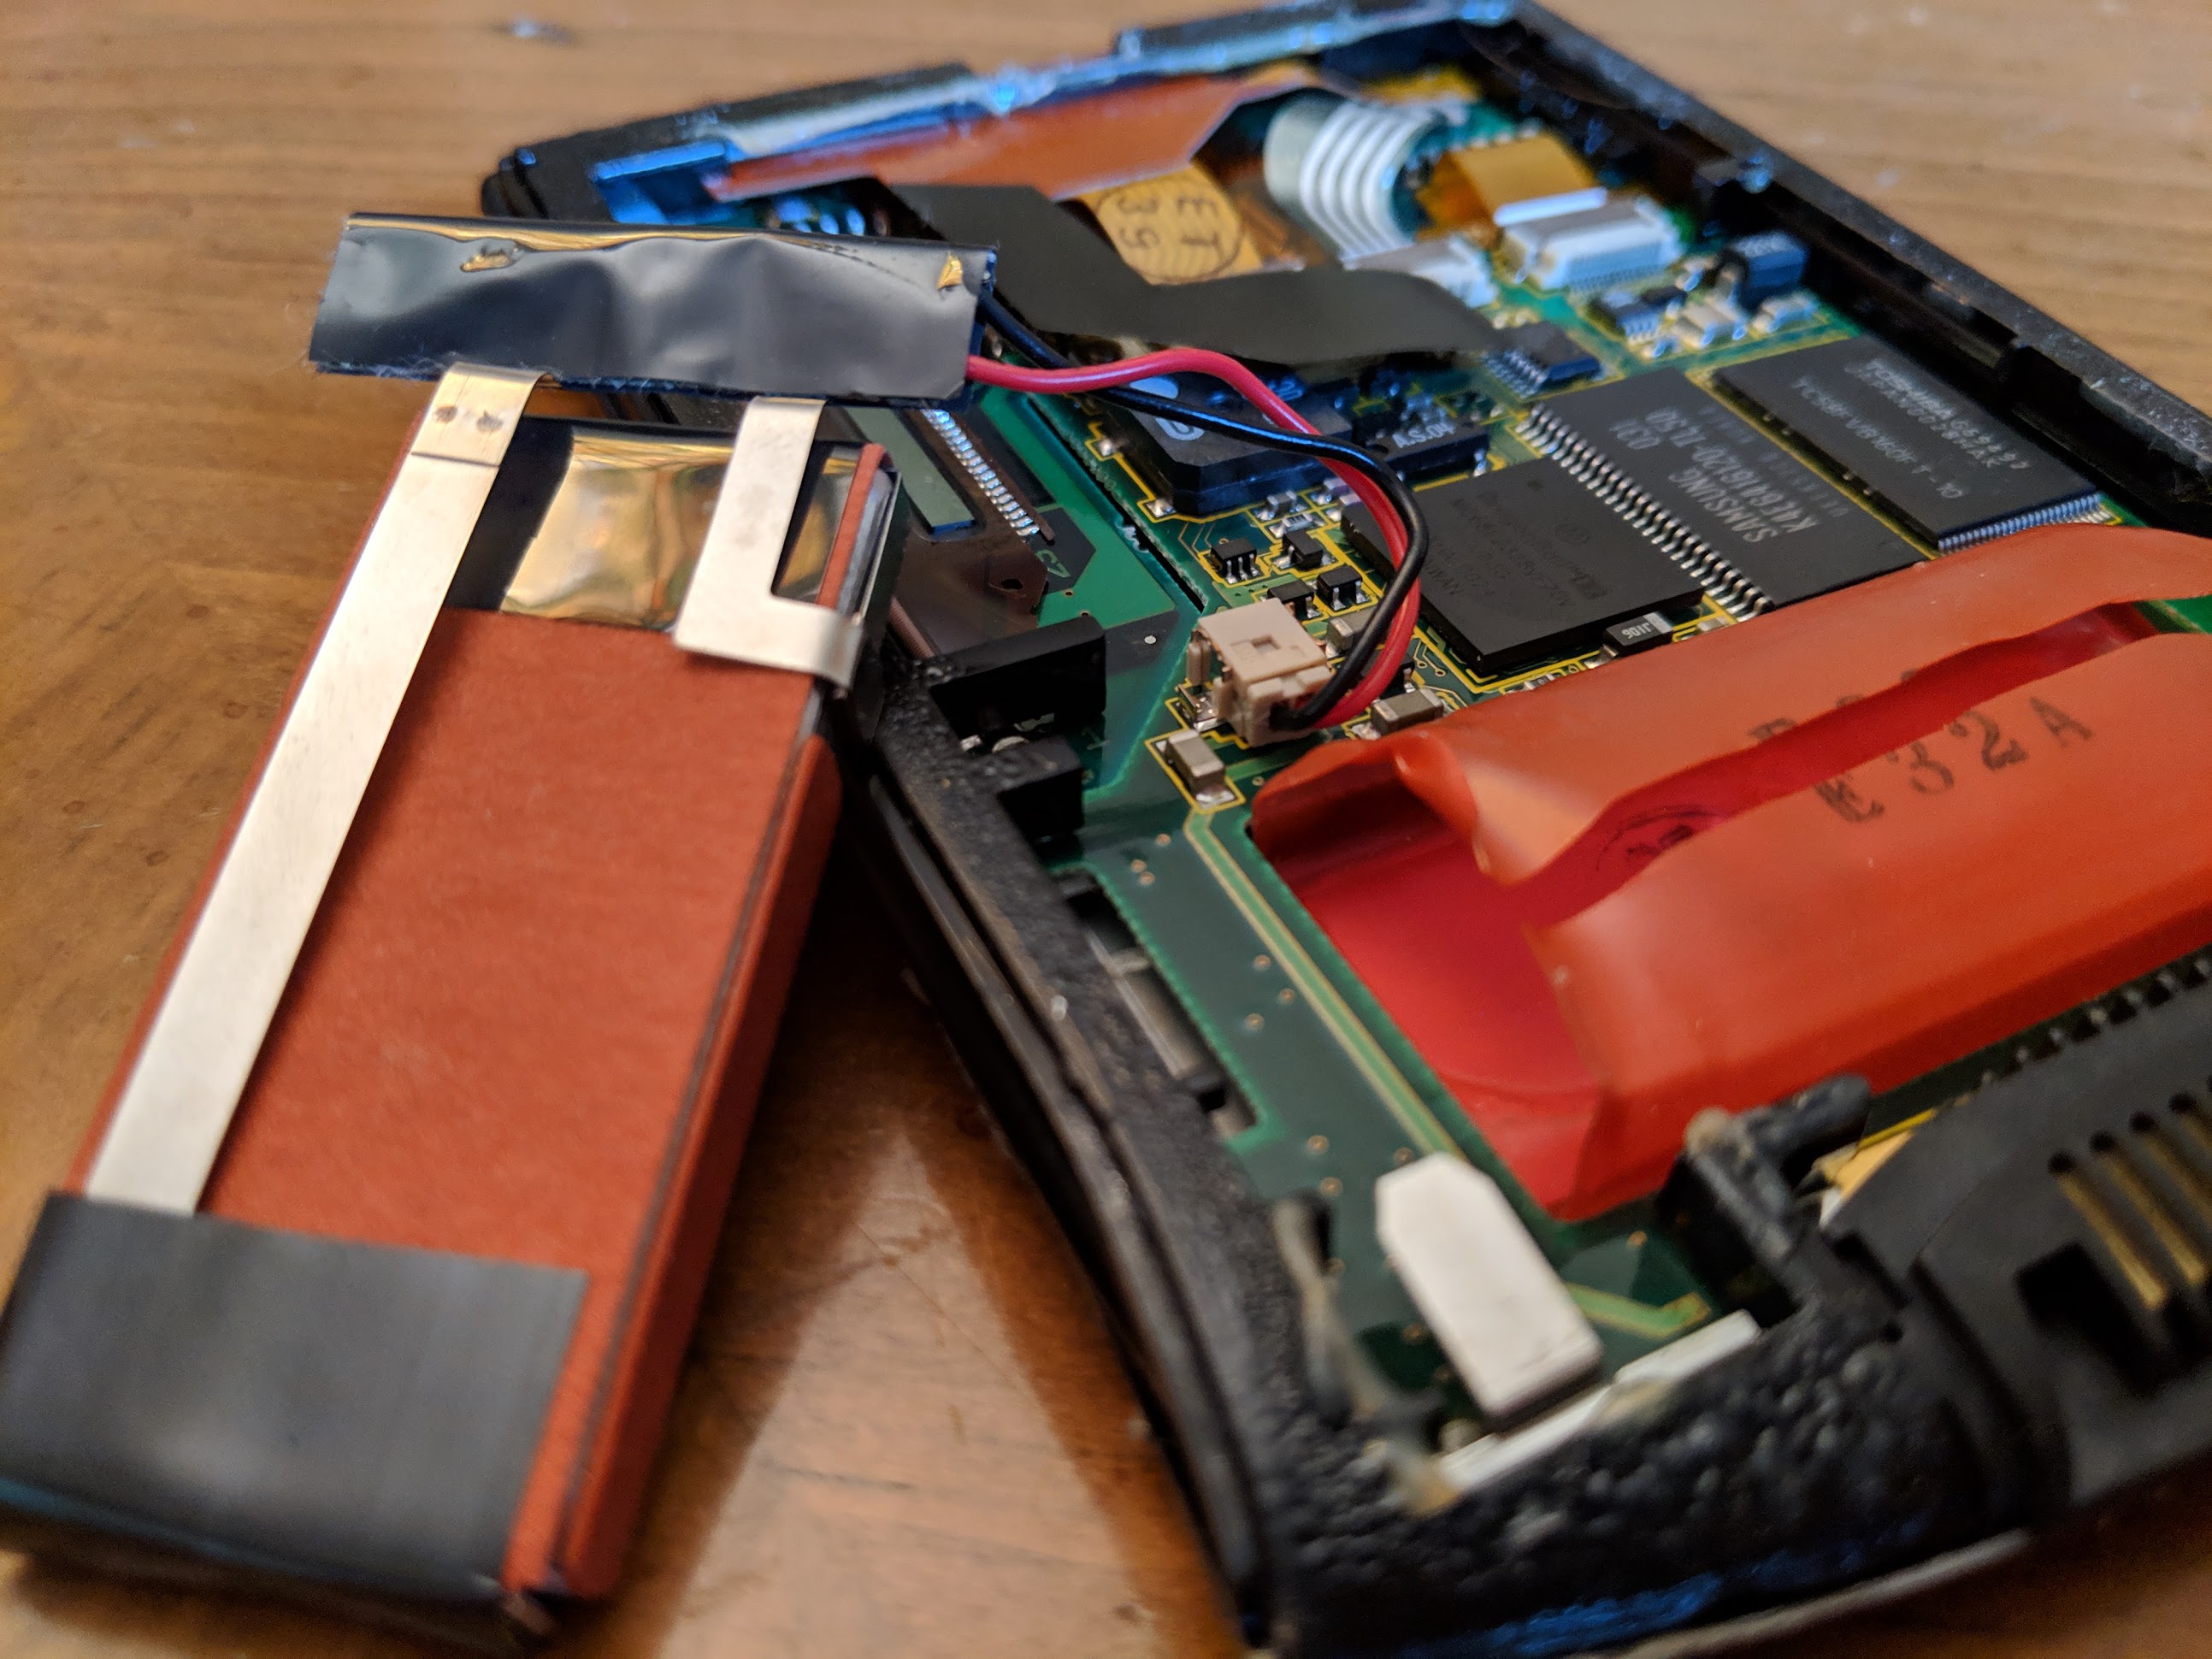
With that, the battery is almost free. All that's left is to disconnect it from a surprisingly user-friendly power connector. Use your fingernails to wiggle the connector out of its socket. You'll notice this connector is keyed, so it should only go in one way, but for reference, note the cable positioning: ground on left (black wire), power on right (red wire).
Plug your new battery in the same position and tuck it into the plastic wrapper. Even with this being cut open, the battery will still sit securely in place, especially once everything is reassembled.
If everything goes well, the device should power on instantly and automatically, booting into the setup process. However, you should turn it off as soon as you've confirmed everything is working. The metal backplate here also serves double-duty as a heat spreader, and the CPU can get pretty hot without it.
Thankfully, reassembly is much easier than disassembly. Test the backplate on the device to make sure it still sits flat, and gently bend out any warps that were introduced in the removal process. Next, lay the backplate down, face up so you can see the outline of residual adhesive. Apply some heat to melt the adhesive, then quickly press it back onto the Palm V. Continue applying pressure until the backplate once again sits flush with the rest of the unit, then hold for one minute to let the adhesive cool and harden.
When all's said and done, you should once again be able to use your Palm V independent of a HotSync cradle!
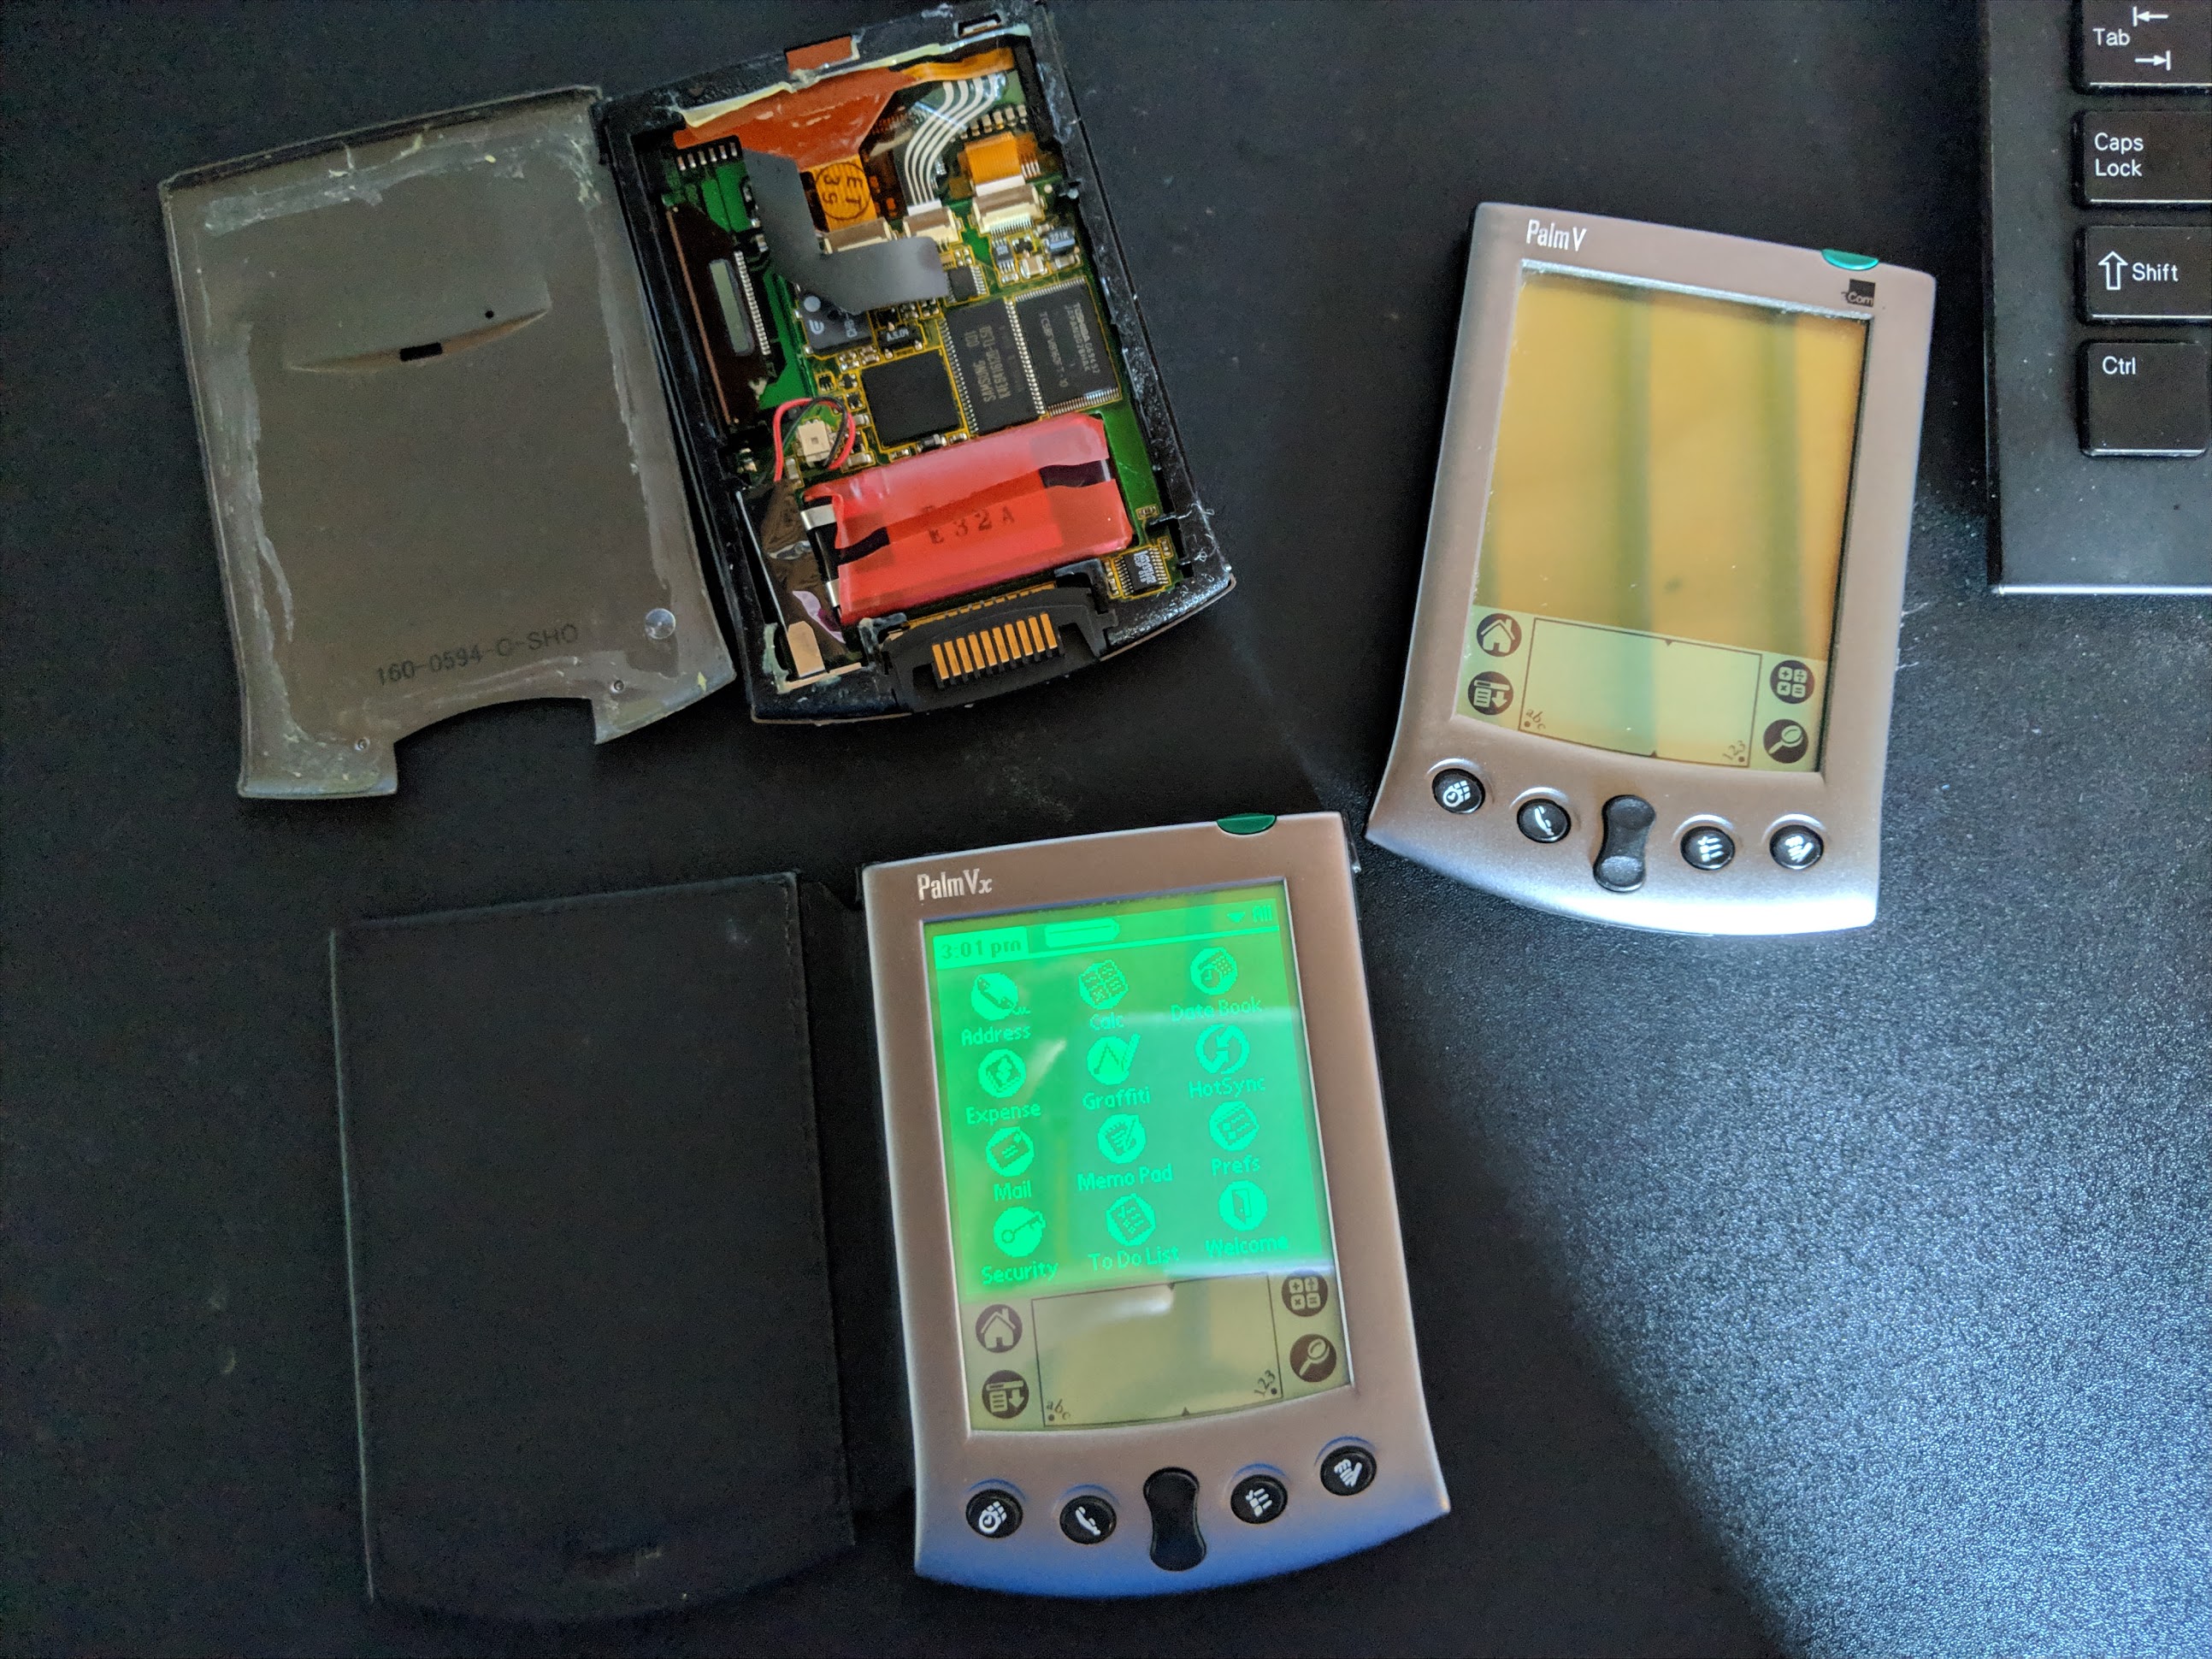
... And now it's confession time. Why three units in the picture above? Well, practice makes perfect, as they say. My first unit (top left) was pretty much a disaster. First I tried using a hair dryer without enough heat, which only led me to damage the casing as I tried to pry it apart. Then I tried a heat gun and learned the awesome melting powers of the front-facing buttons and screen glass. Disappointed, but undefeated, I found the other two units being offered up on eBay as spare parts. As it turns out, both units worked fine, but also required new batteries. Thankfully, I didn't need both of them in the end. Taking lessons learned from the first attempt, I decided to risk it on the better unit and went straight for the Vx. Using the methods described in this guide, the battery replacement was successful and took me less than half an hour altogether.
If I can do it, you can too!
Notice
PalmDB is proudly hosted by fans for fans and is not affiliated with the former Palm Computing company or its current rights holders in any official capacity. While we are not able to provide official support, if you appreciate our efforts to keep Palm alive, please consider donating to PalmDB! Also, join the Discord community for discussion of all things Palm and Pocket PC!


